Defensive Lab Series: PFSense Configuration
In the previous post, we covered the process of installing Pfsense. In this post, we’ll be doing pfsense configuration to route our network traffic through the pfsense firewall. If you haven’t read part 1 of this then I highly recommend you read that first as I’ll be continuing from exactly where we left.
Read part 1: http://blog.certcube.com/corporate-pfsense-installation-lab
PFsense Configuration
Before anything we need to set our LAN interface so that we can access our WEB Interface.
So Enter 2
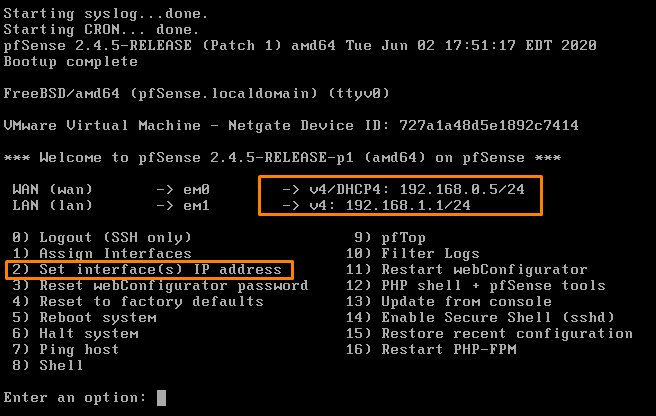
We are configuring our LAN so select 2
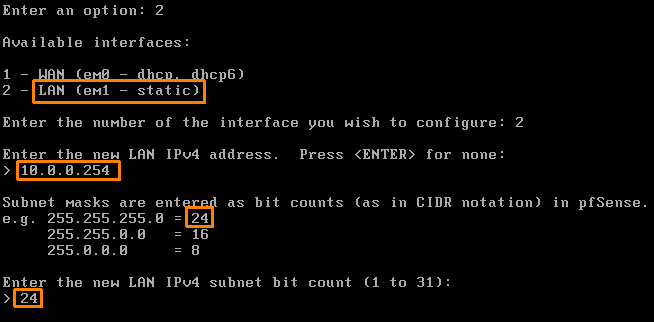
Enter the IPv4: 10.0.0.254 ( the one we gave to our LAN network in the begging )
Subnet bit count for this one is 32 bits so enter that
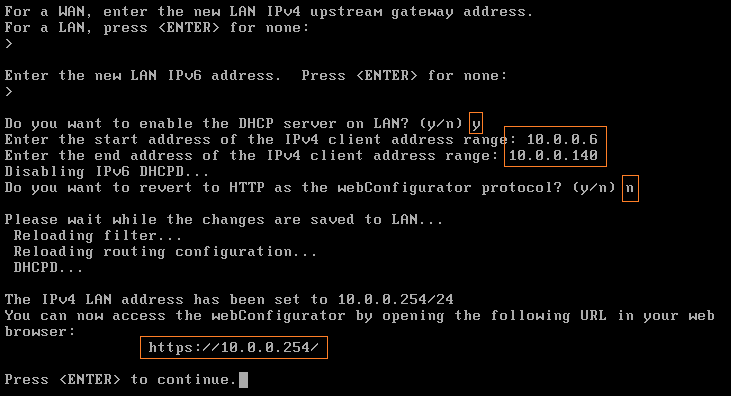
- We do not need a upstream gateway so leave blank and continue with LAN.
- We are not using any IPv6 so leave it black.
- IN the beginning, we didn’t enable DHCP service as mentioned in the beginning we will be doing that in the router as we will be routing the traffic through pfsence so enable it here enter Y.
- Now assign the START and END range of the network.
- Also, we will be using HTTPS so enter n
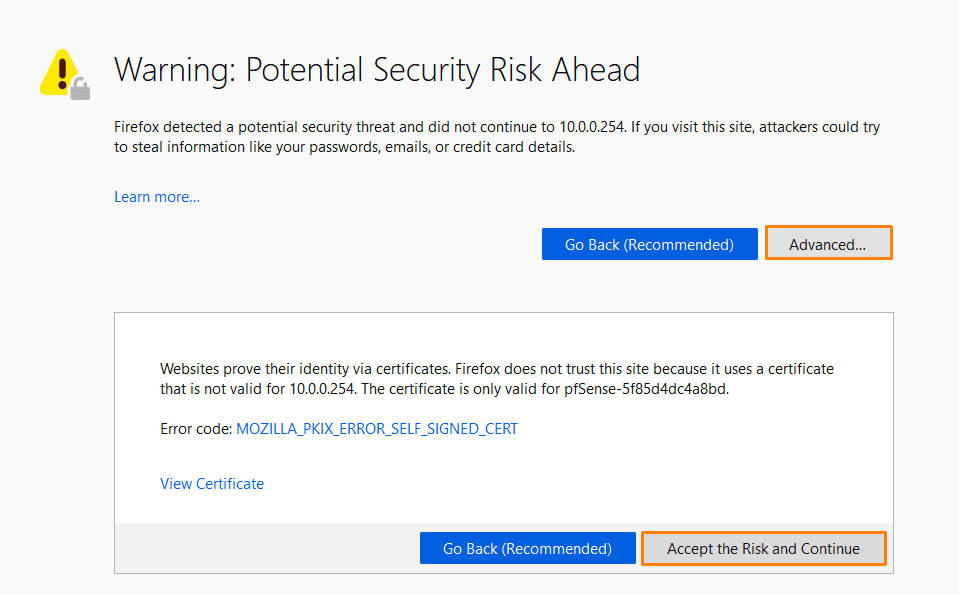
Now open the web browser ( HOST ) and visit
Click advanced
Accept risk and continue

DEFAULT CREDENTIALS ARE
USERNAME: admin
PASS: pfsense
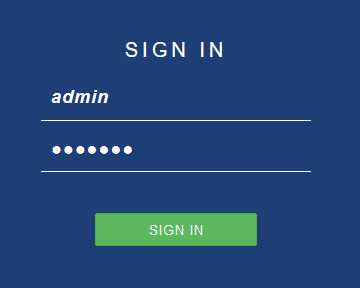
As with anything it is not recommended to use default credentials so change them.
Before we move forward and start configuring firewall rules and additional service packages we need to configure the system.
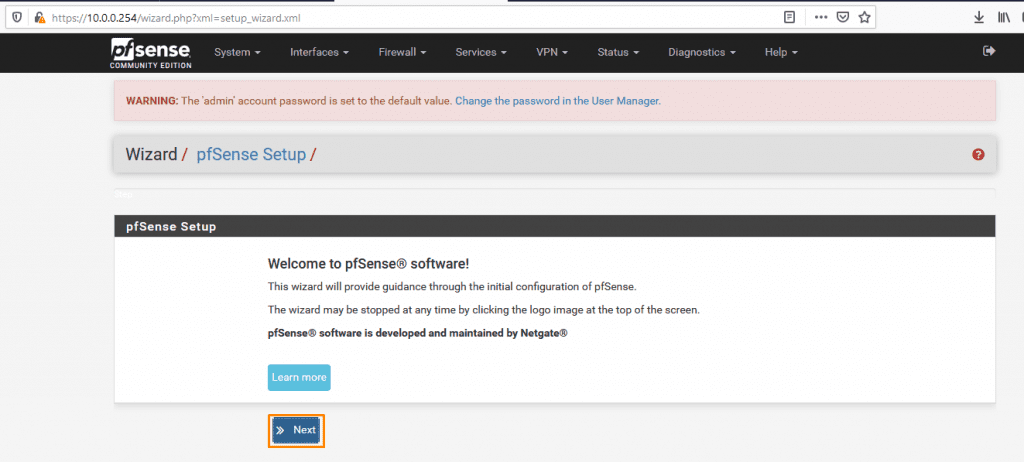
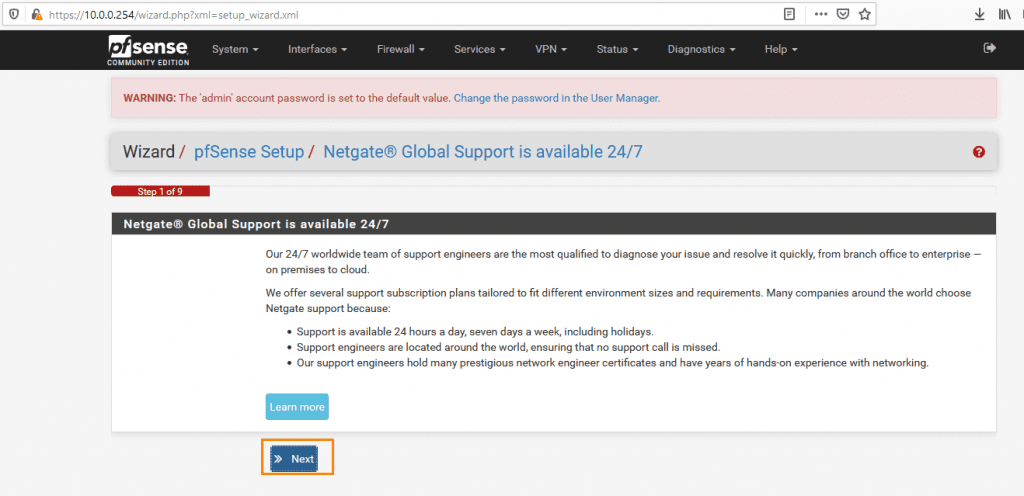
If you have a domain on which you want to host pfsence or on the central server of your organisation enter that here we’ll be using local domain only.
Also, DNS servers are of google just so that we have internet connectivity.
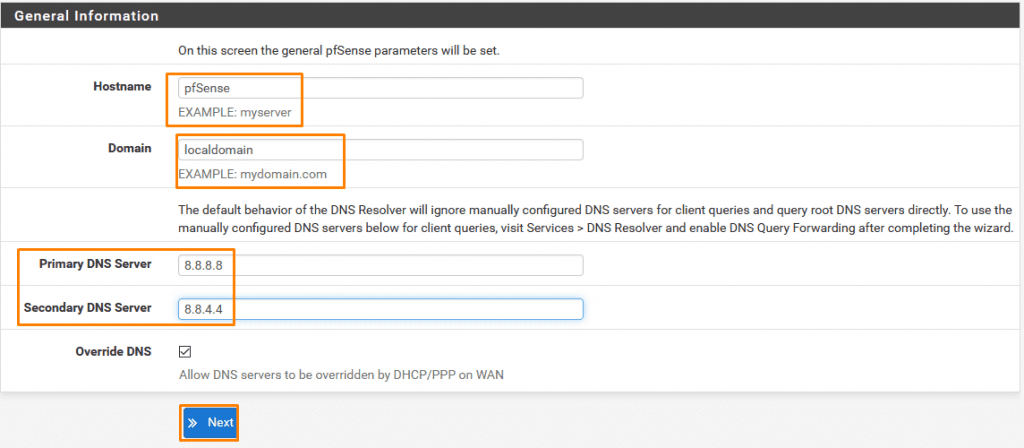
In an actual organization environment, we don’t do that. There we set a cloud so that we can ping that and our IP becomes our DNS.

Select you Timezone

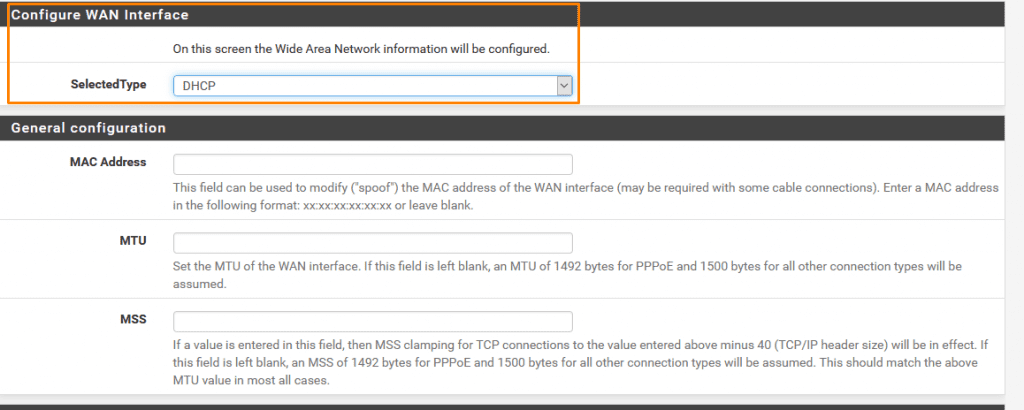
Now to configure the WAN interface if you are in an organisation then enter the static IP provided by your ISP or if you are using it home then use DHCP.
Keep these checked to block intrusion.

We already configure LAN in the beginning so it’s already done click next.

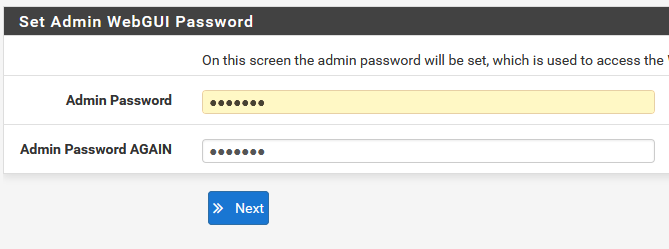
Now enter the password and continue
Click RELOAD.

Click Finish
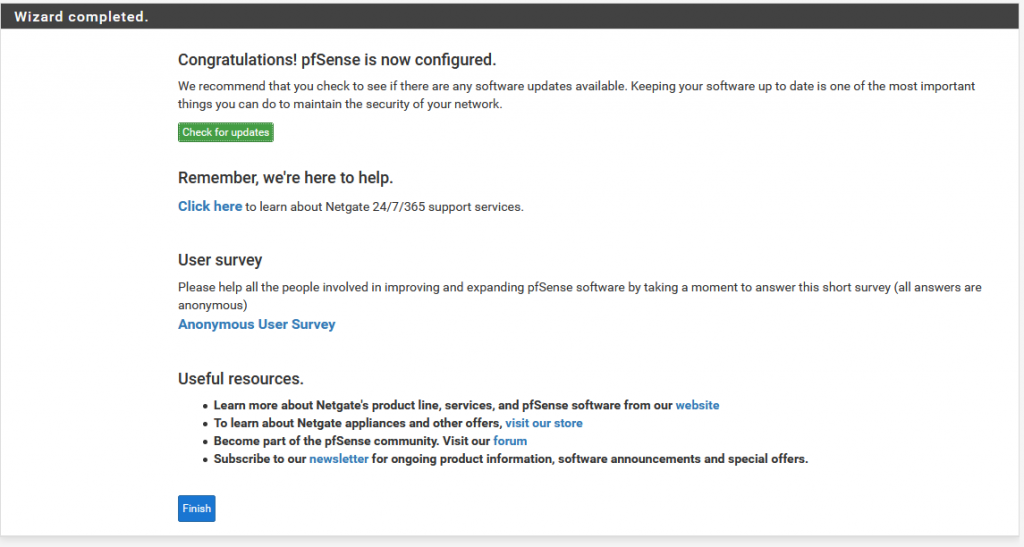
Accept the User Terms and continue.
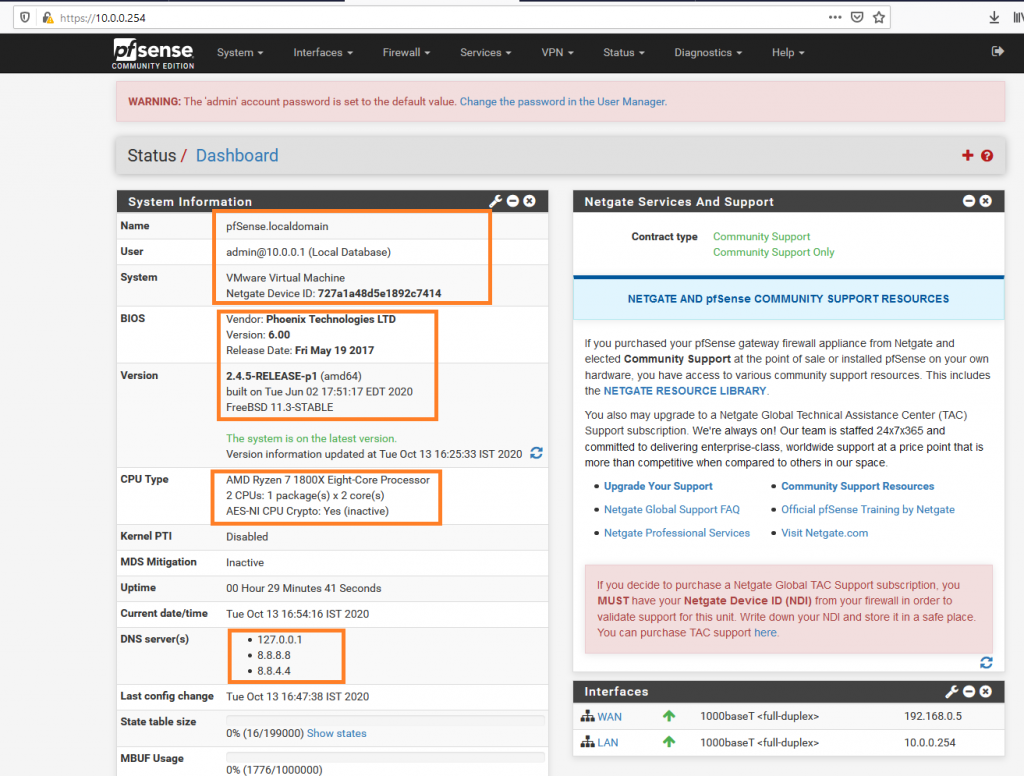
At the Home screen, there is hardware, network, and current system information.
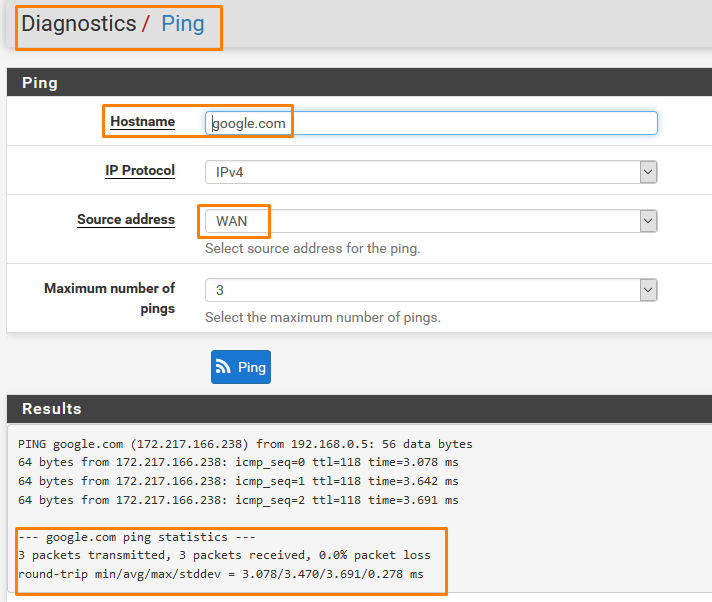
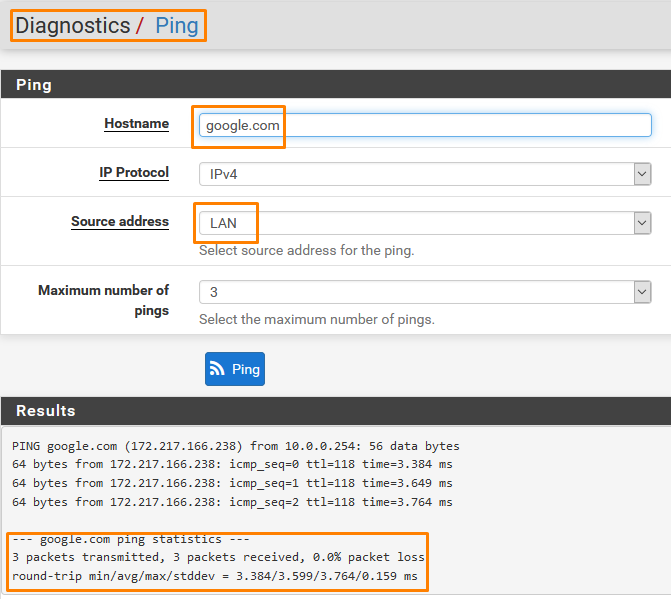
To check whether we have network connectivity
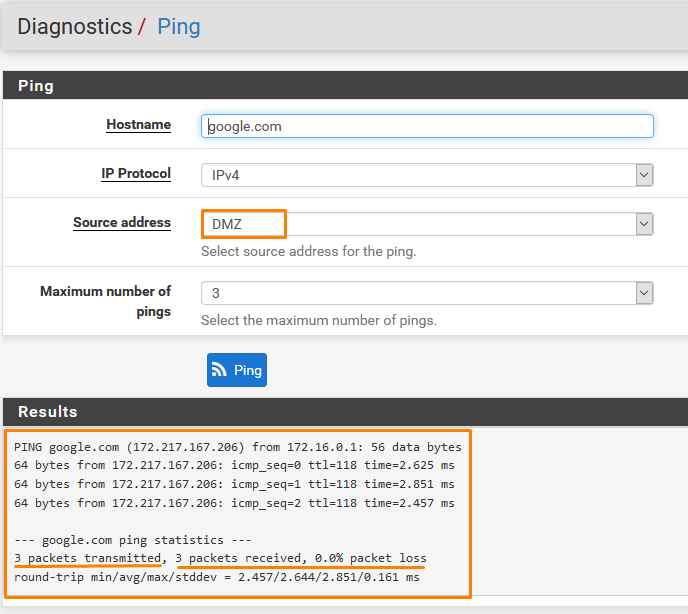
Go to Diagnostics > Ping
Check for both the Interfaces
Now we need to configure our virtual networks.
Go to Interfaces > Assignments
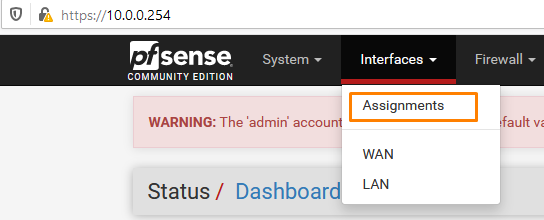
We already have our WAN and LAN configured we need 2 more Interfaces to assign to our Virtual networks.
Click ADD

Click OPT1 To configure

- ENABLE
- RENAME TO LAN2
- STATIC IPv4

Enter any IP from the range we gave to LAN2. Here we assign it at the end of the spectrum.

We Do not need to block anything as we have already done in the WAN.

Click Save and apply changes.

Now we need to same with OPT2 for DMZ.
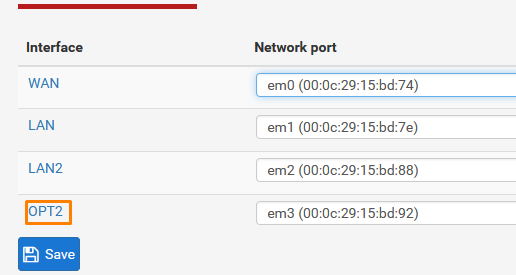
- ENABLE INTERFACE
- NAME: DMZ
- TYPE: STATIC IPv4
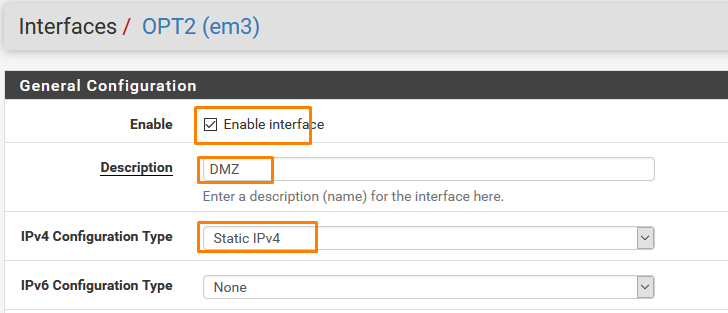
IP from the range we assigned to DMZ

Same here as we did in LAN2.

Click Save and Apply Changes

And we are done with the configuration of our interfaces.
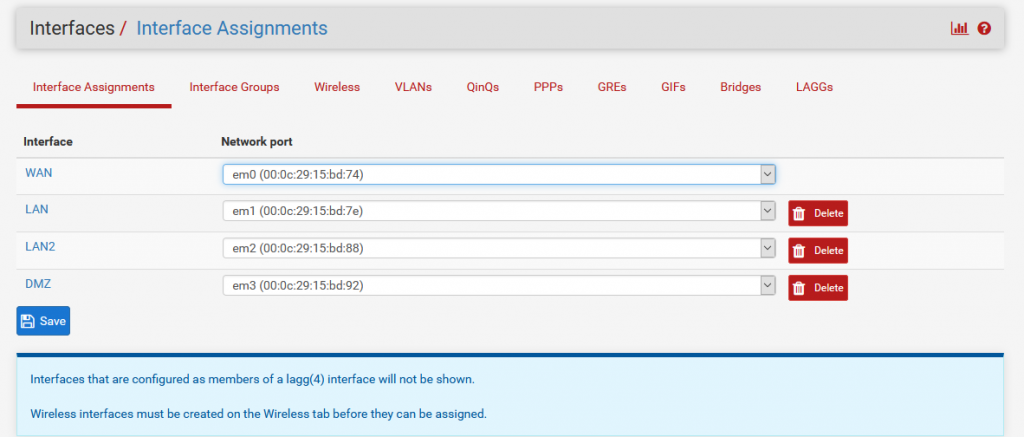
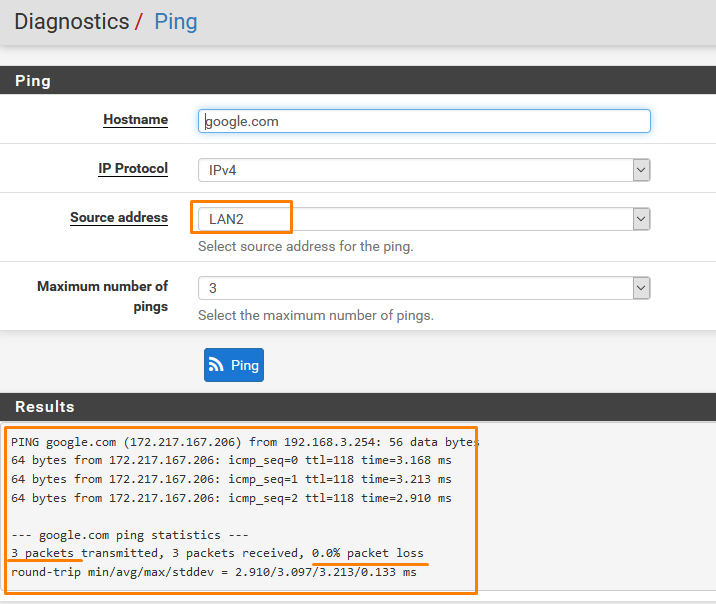
To check the connectivity
Go to Diagnostics > Ping
And both we have connectivity.
With this our pfsense configuration is complete. Now all we have to add firewall rules to our interfaces and connect other virtual machines to our pfsense router instead of NAT to rout the traffic through pfsence.
Firewall Configuration
So now that our pfsence is properly configured we need to add some basic firewall rules. As we don’t want
- LAN
- LAN2
- DMZ
Interconnecting unnecessarily. But before that, we need to turn on DHCP Service to access the internet. SERVICES > DHCP Server > LAN2
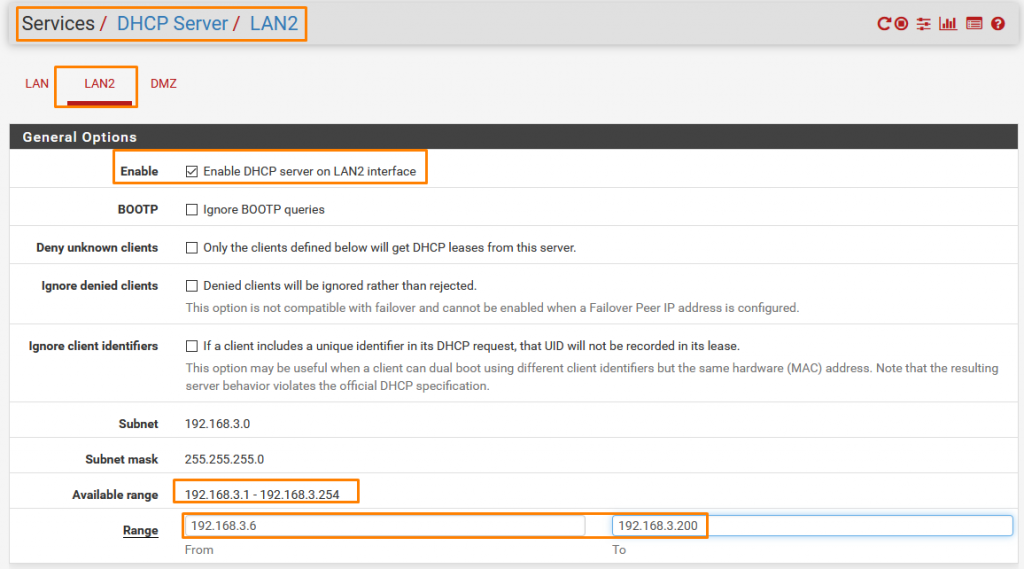
Scroll down Click save and then Click Restart service or else it won’t take effect.

Same with DMZ
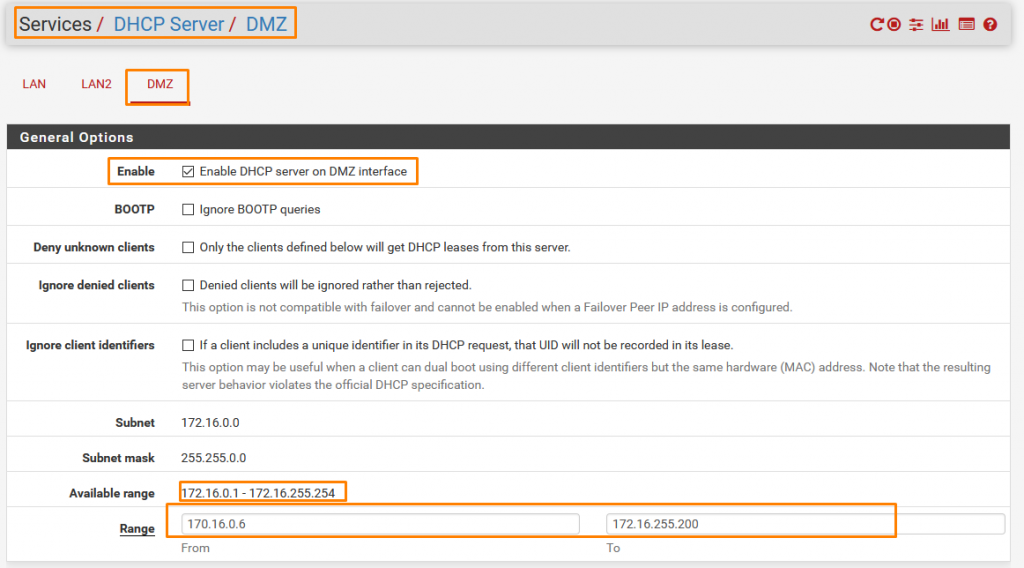
Now Click
Firewall > Rules
Here we have some pre-configured rules for WAN and LAN Interfaces.

For LAN the first one is the Anti-Lockout rule. Do not change or remove it as if done so you won’t be able to access the web configurator and will have to do the system installation again and all the present configurations will be lost.
The other 2 Rules are to allow internet access with on the LAN interface. Firstly we need these 2 exactly same on the LAN 2 Interface.
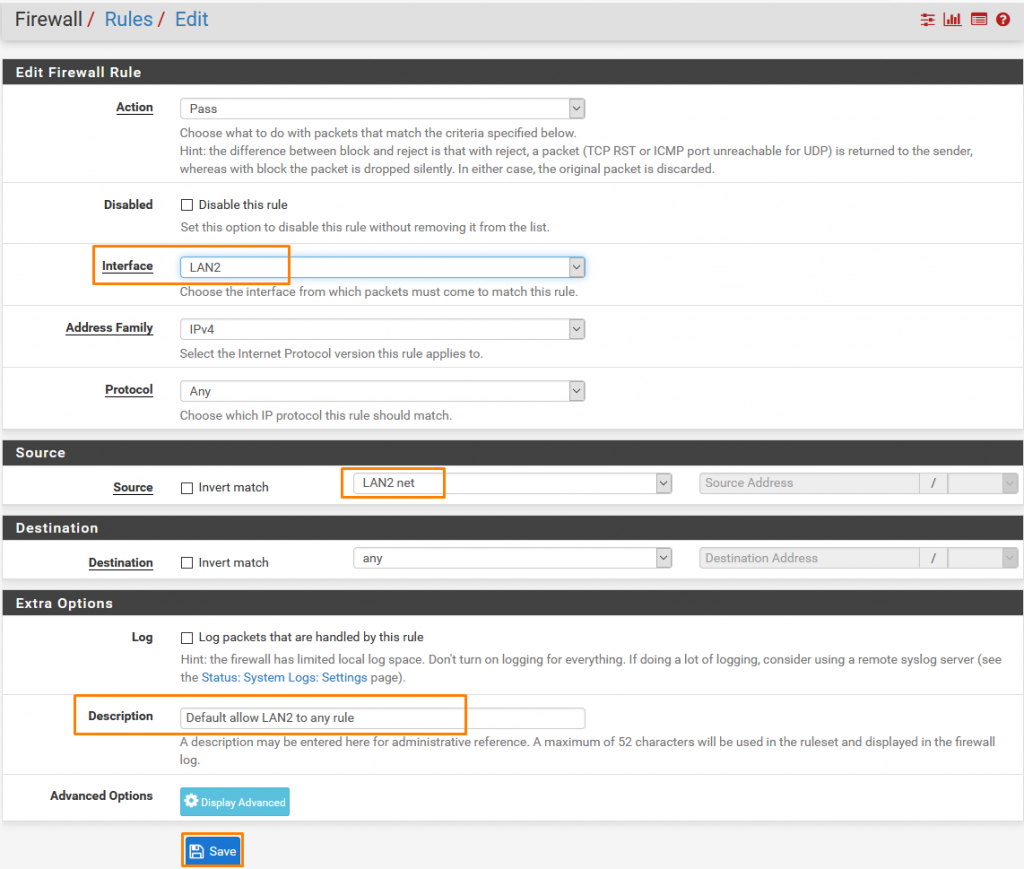
To do so either we can create a new rule from scratch or we can simply copy the rule to the LAN2 interface. To copy the Rule Click Copy (as shown above ).
Now change the interface to LAN2
Source to LAN2
Click Save
Now Click Apply Changes. Either you can apply changes every single time you define a rule or can define all the rules and then click apply changes the results will be same.
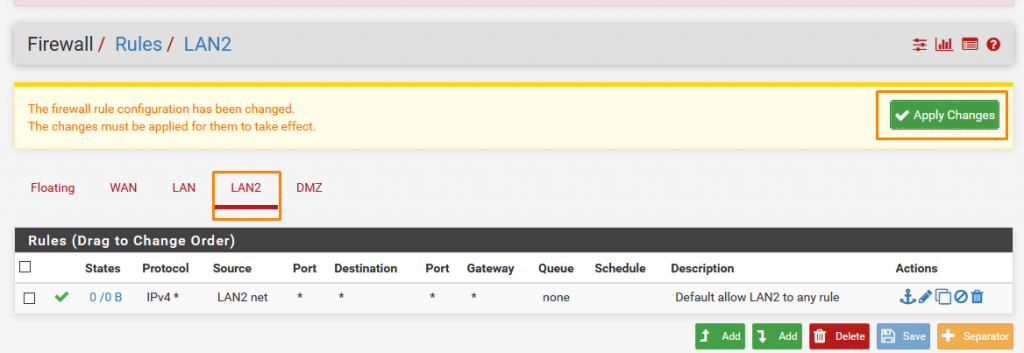
Now we need to add a few more rules so click on add rule to top.

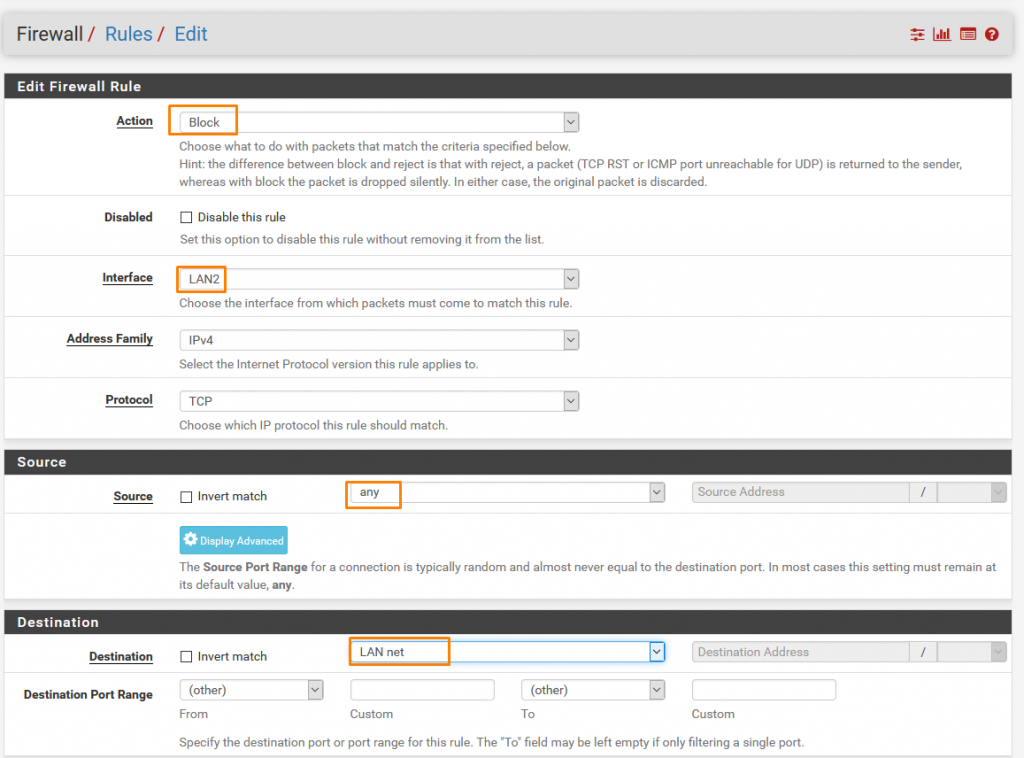
This one Blocks any connection from LAN2 to LAN Interface as we Don’t want the interconnecting in an organization.
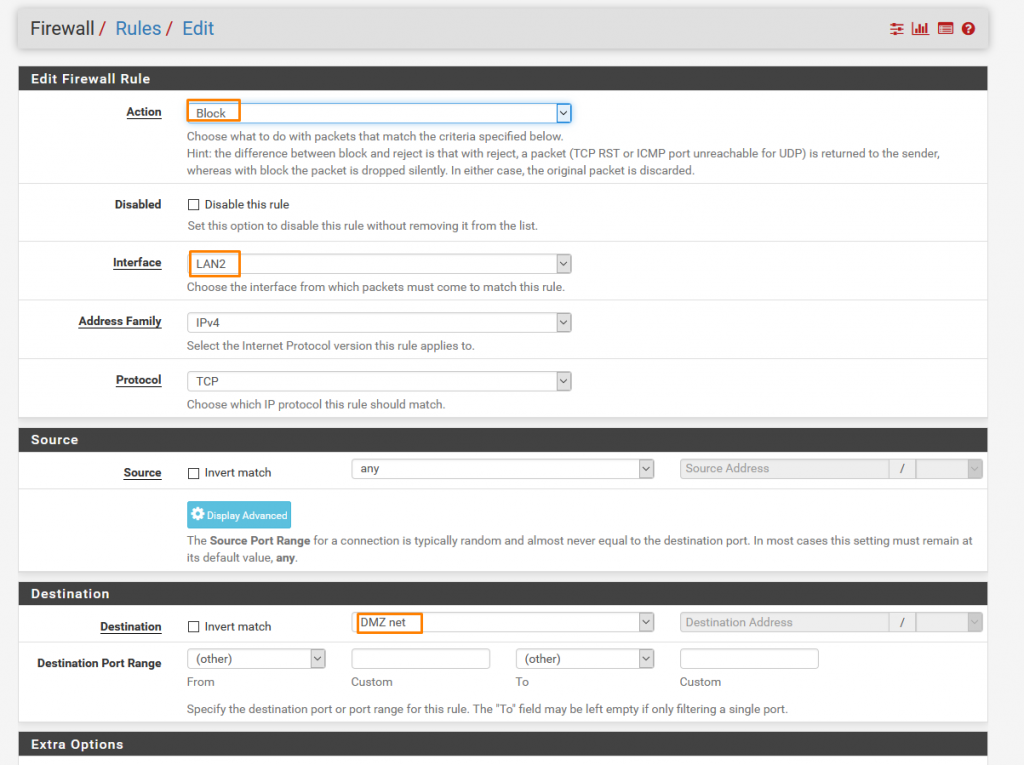
Another Block rule for LAN2 to DMZ.
Once done click apply changes.

Now for DMZ, we want a bit more extra rule sets.
Creating a rule is the same procedure as shown above.
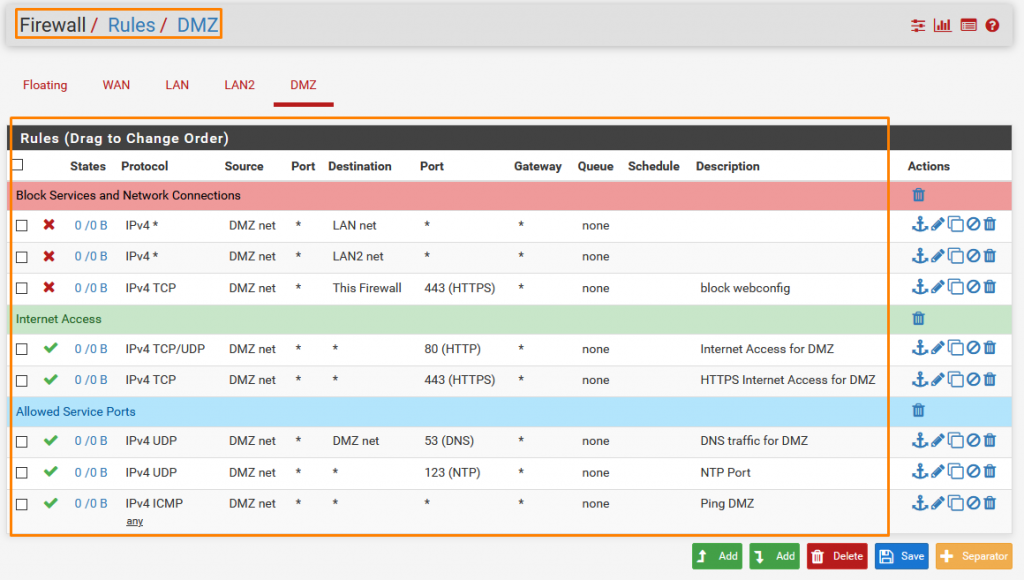
In DMZ we have done
- BLOCK DMZ TO LAN
- BLOCK DMZ TO LAN2
- BLOCK DMZ TO FIREWALL ( Web Configuration interface as we don’t want to allow access to the firewall to any unauthorized person on the whole network )
- ALLOW INTERNET OVER BOTH HTTP AMD HTTPS
- ALLOW DNS TRAFFIC TO DMZ
- ALLOW PING
- ALLOW NTP ( for clock synchronization)


Recent Comments