BurpSuite Proxy Configuration for Pentesters (PART-3)
PROXY:INTRODUCTION
Let’s begin with a little introduction to the Burpsuite proxy configuration option tab, which is the most significant tab in this Burp or, to put it another way, a vital feature of this program because it allows you to interact with requests and responses in real-time while also investigating proxy history. This is also similar to crawling a website or intercepting history. It also allows us to analyze how the website functions and behaves when we use different choices.


FOXY PROXY & Wappalyzer
Now, let’s talk about FoxyProxy, a Firefox extension allowing you to alter your internet connection between one or more proxy servers. It also has the best proxy functionality. The foxy proxy landing page is shown below, where we may add new proxies and import other settings. The steps to enable Foxy Proxy in Firefox are listed below.

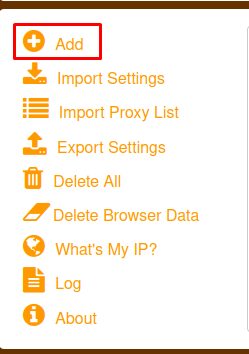
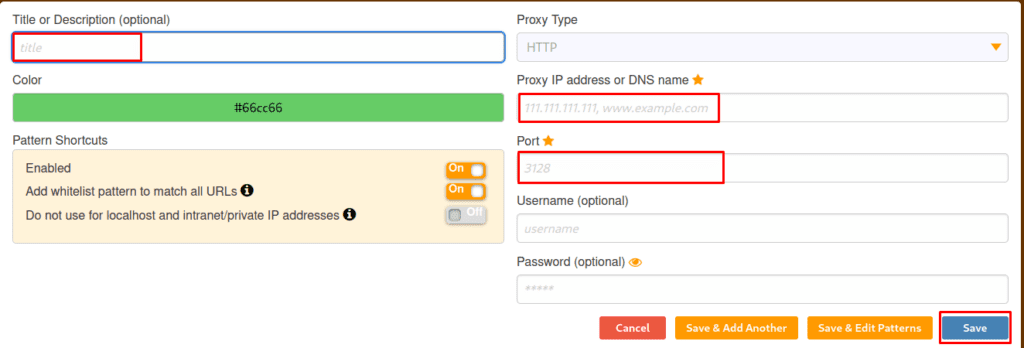
Note: – After enabling Foxy proxy in Firefox, open Burp Suite to browse. You may also stop the proxy by clicking on Turn off one.
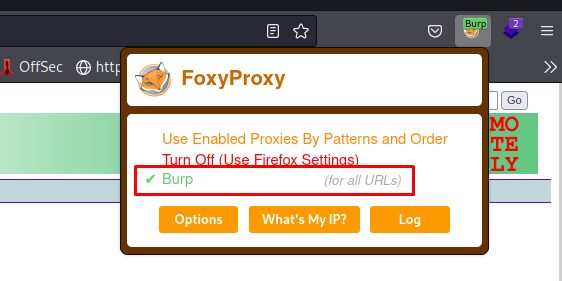
After users have completed all of these processes, we must get the Burp Suite CA Certificate and import it into the Firefox settings. The certificate can be obtained by simply searching. http://burpsuite.


Now, let us discuss Wappalyzer. Wappalyzer is a technology or an extension that is used to state how the website we are browsing is made, it also reveals the technology, CMs, and frameworks the website is utilizing, and many more.

INTERCEPT TAB
The first tab is options: – intercept, and this is where the real work begins. Every HTTP request sent by the browser will be displayed in the intercept tab, and we can alter it, but clicking the forward button will send us to the landing page. Alternatively, we might state the destination page. And we’ve forwarded all the pages till we arrive at the item we want to see. And we have various alternatives here: – To intercept any page, ensure the intercept button is turned on.

Let us talk about the following tabs: –
o Forward-When we change a request in any manner, pressing the “forward button” just sends that message to the server.
o Drop-It is the inverse of forward; it is used to discard a message so it is not forwarded.
o Action-it is used to define what action can be taken or performed on the currently displayed message.
o Open Browser-It will not do much more than open a chromium browser where burp is enabled, but we have already described how to set it on Firefox.
Below you can see that we open a website and after intercepting it, we get an HTTP request that we can edit, such as we can end payload through it, but all we have to do is send the request to the repeater and further brute forcing can be done, which we will study in later topics. This was only discussed to make you appreciate the significance of the proxy tab.
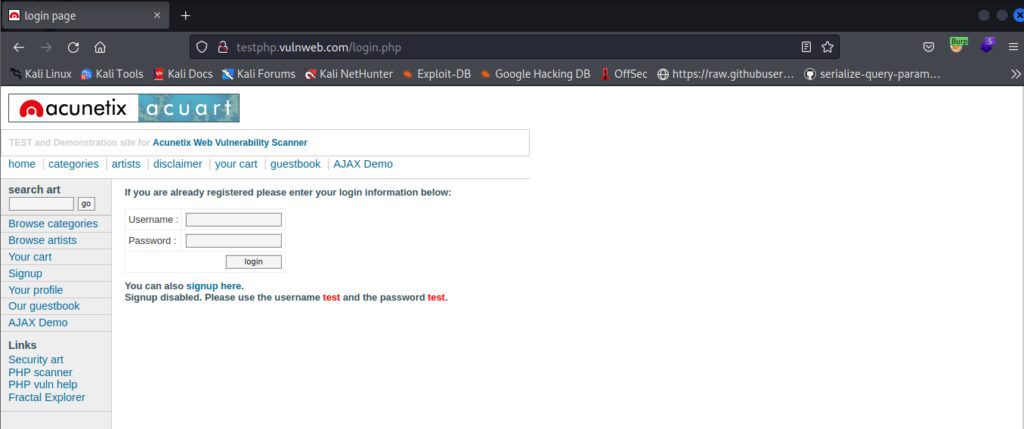


Additionally, users can see that we intercepted another website and received a request, where we obtained an UID and passw which is used to execute brute force and future attacks, and we can change it and use it for SQL injection, etc. (Details will be provided in subsequent topics.) The following are some actions that can be taken and where this HTTP request can be passed or sent for further processing.

HTTP History
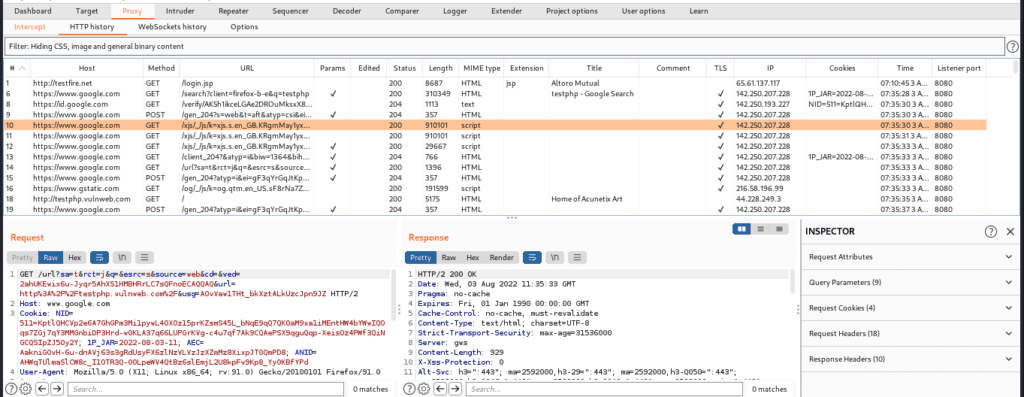
The primary goal of this tab is to describe that it preserves a complete record of the websites, including all responses and requests that have been routed through the burp proxy. It is used to store all requests and responses even when intercepting is disabled. By selecting a single website’s history, we can view the whole message in the request and response pane, as shown below. We can also make it bigger.
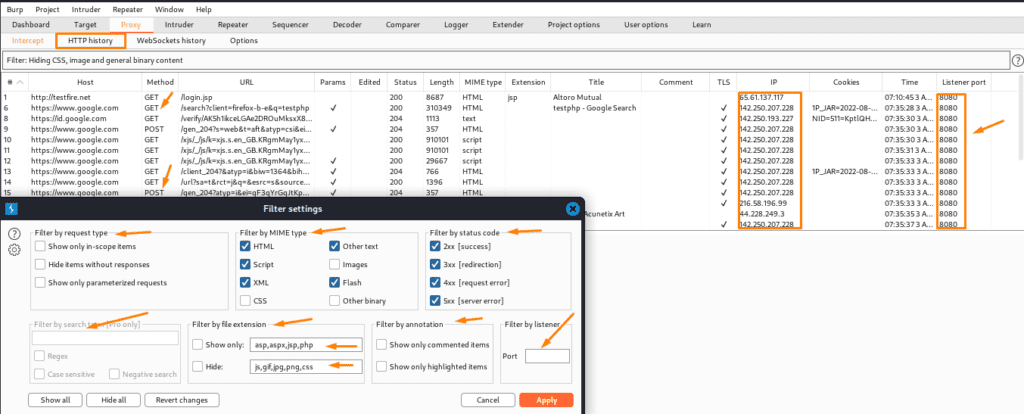
Below are the filter options which are similar to the target one as we have discussed it in the previous part. So here we are not explaining the filter options.
WEBSOCKETS HISTORY
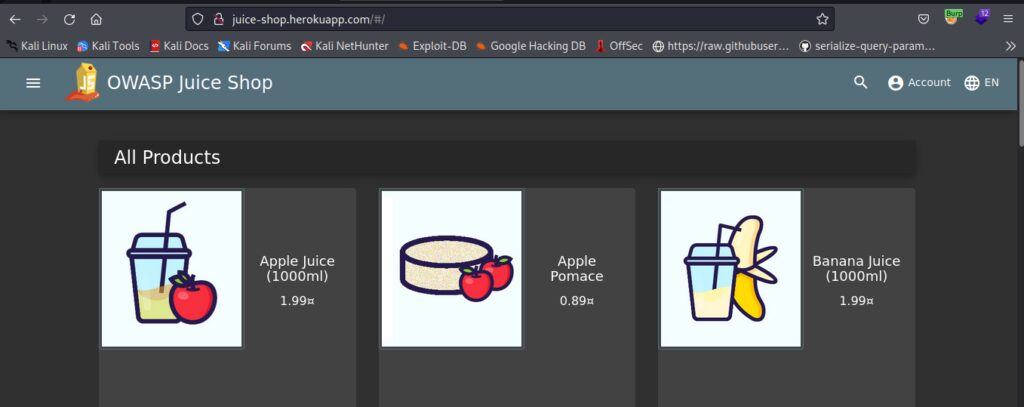
To begin, we will clarify that the WebSocket history will not be displayed by default; nevertheless, some specialized websites will show us the web socket history and the response and requests between the client and server.

The website is Juice-shop.heroku.com This website is going to show you the web sockets in the proxy tab.
PROXY OPTIONS:INTRODUCTION
As surprising as it may appear, burp contains various properties that you cannot even imagine. This tab also includes proxy listeners, HTTP requests, WebSocket messages, and match and replace, among other things.
Proxy Listeners-A proxy listener is an HTTP server that monitors for incoming browser connections. Furthermore, burp just creates a single listener port, 8080, which is used for testing all web apps. It also enables us to track and intercept all queries. We can set up several proxy listeners.

There are many benefits of adding pa roxy listener is that: –
- If we want to test a web application and a mobile application at the same time, then we can have them at different ports.
- Also, sometimes we want burp to listen at different IP addresses.
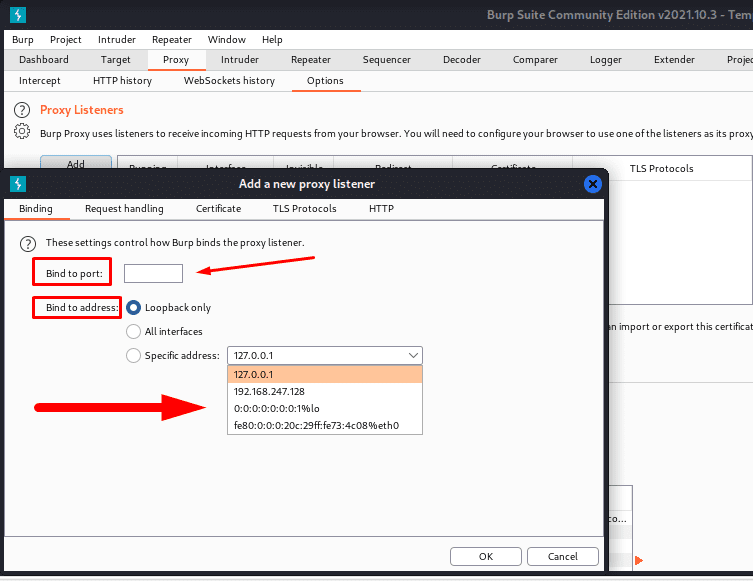
BINDING
It helps to bind the proxy listener to the local network interface. The further options are: –
- Bind to port – This program option is primarily used to specify an alternative port number, such as 8080. and we should use a port that is not in use by another program and is available.
- Bind to address – This one is to set the IP address of that interface. We can just set it to loop back only and it will define that we have a customer-centric VPN, and if we have set it to all interfaces and a specific one, then other devices may connect to that listener.
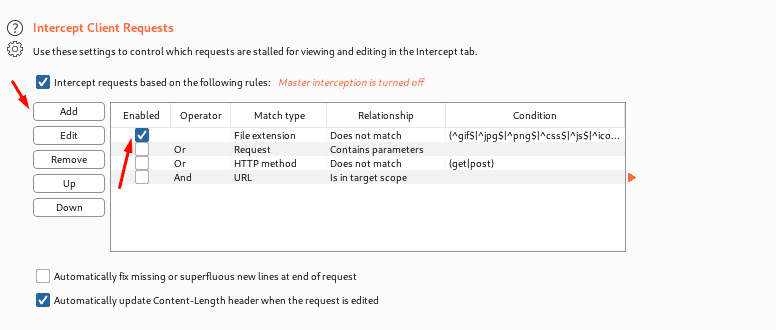
Intercept Client Request-Here client can use these settings basically for applying rules. And to control which requests are stalled for viewing and editing in the intercept responses, Rules are prepared using the AND/OR operators.
Intercept Server Response-It is just mostly similar to intercept client requests, but here the responses are being stalled.
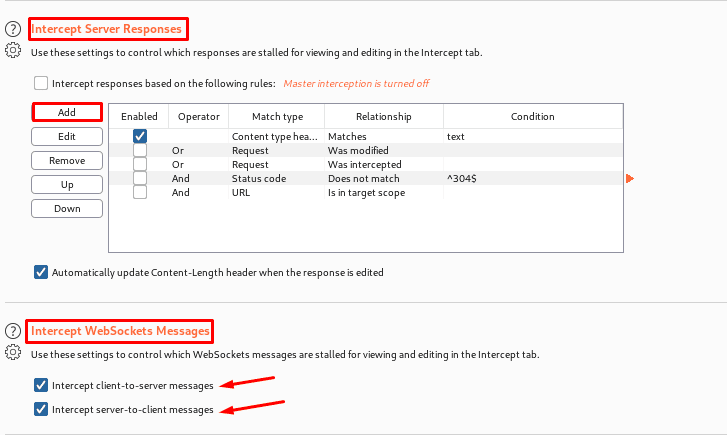
Intercepting Web socket Messages-User can generally use these settings to control which WebSocket messages are to stalled for viewing and editing in the intercept tab. We can also configure separately the messages which are intercepted.
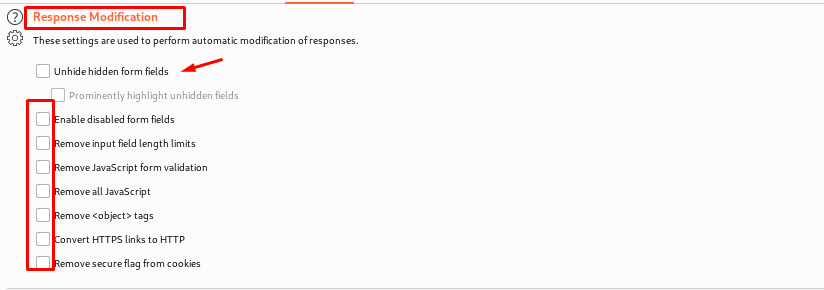
Response Modification-In short, these settings Are used to perform modifications of responses. These following options may be useful for disabling the client-side logic for testing purposes. As the same suggest, u can definitely able to get hands on.
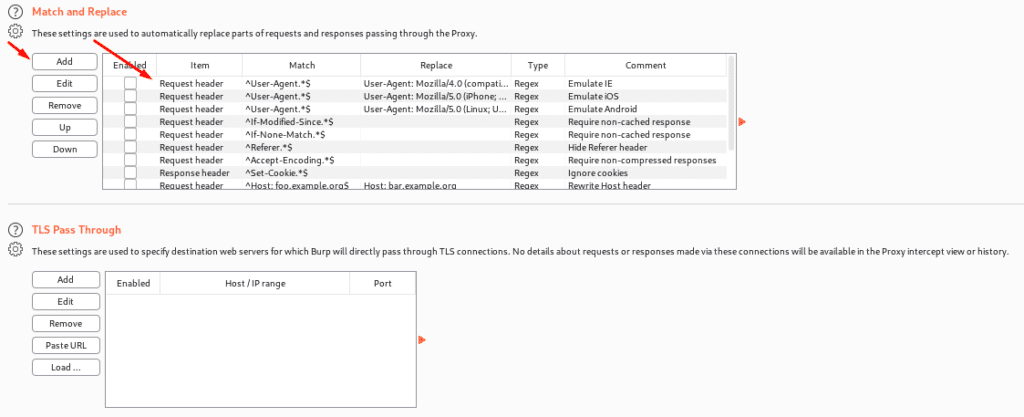
Match and Replace – These are the fundamental options that allow us to replace sections of requests and responses via the proxy. The executed replacement is made for each HTTP message and if rues are executed. The rues can be defined separately for requests and responses, with the first line specifically for requests. There are a number of rules, but they are all disabled by default.
TLS pass through – These are the settings that are used to specify the location of web servers. Let’s say a client wants to conduct a task on a mobile application but does not want to capture or history or proxy intercept view / no details will be provided. The application accesses numerous domains before passing over a TLS connection, allowing us to work on other traffic with Burp.
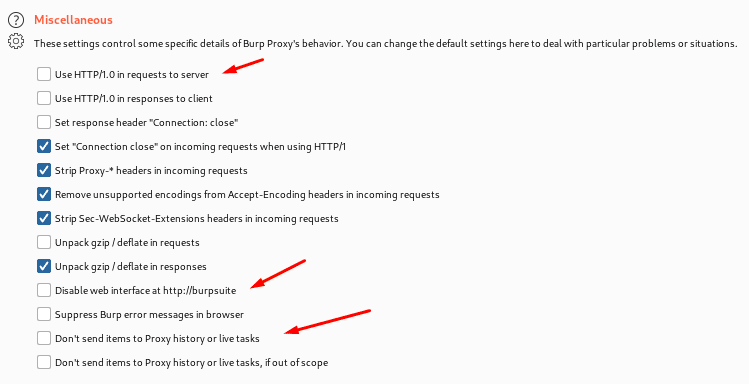
Miscellaneous-These are some options which a user can perform and get hands on it from the name itself, it tells use the functionality if the miscellaneous options.
Thanks For Visiting, Hope you enjoyed the burpsuite proxy configuration blog.
In the Next part we are going to learn Further essential Topics of Burp Suite.



Recent Comments