Build an IOS pentesting lab via XCode Simulator
This blog is written by our student Pranav Sharma. Doing an iPhone pen-testing can be a tedious task in itself and not having an actual device for the same makes it even tougher. Unlike Android OS, iOS doesn’t have an emulator that we can test the apps on. Although, it lacks an emulator Apple does provide us with a simulator for the same.
This simulator does not support the drag and drop to install apps using the “.ipa” available in the market. Hence, this blog is written so that you can install the apps and pen-test even if you don’t have an iPhone.
To test any app you must have either of the following
- Any Macbook
- MacOS Virtual Machine
The process will be the same for both of them,for the sake of this demonstration i will be using a Macbook.
Let’s now move on to installation part,
First and foremost you will be requiring XCode to build and run your project. Not only this you will also need this to start the simulator.
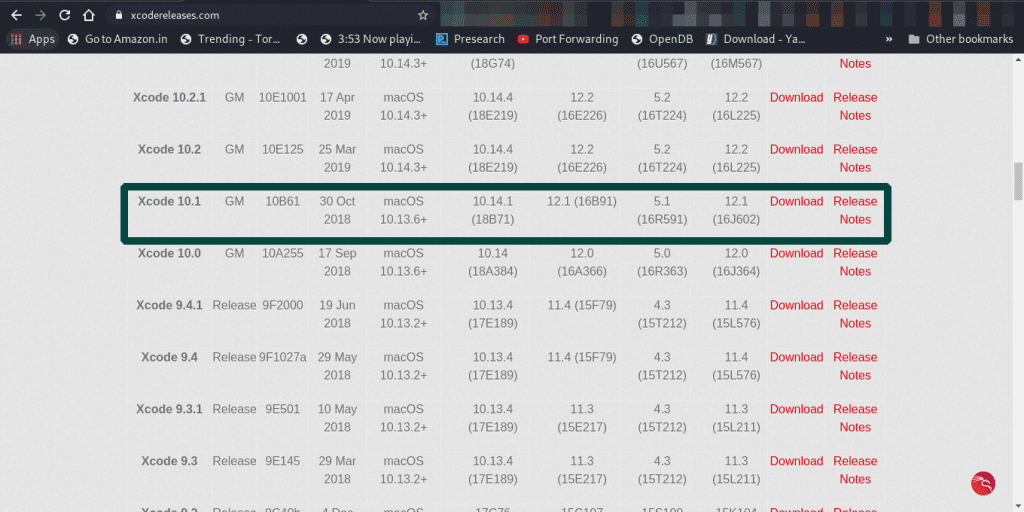
You can download XCode either using the app store or by visiting the XCode Release Page (https://xcodereleases.com/).You will need an Apple id to download it, if you don’t have one you can create one anytime and proceed further.
I recommend using the release page because here you can find an older version of XCode. I am using XCode v.10.1 as it has setting to use legacy build as build target, which is missing in the later releases.
Once you have downloaded and installed XCode you can now choose which iOS version and the device type you would like to simulate.
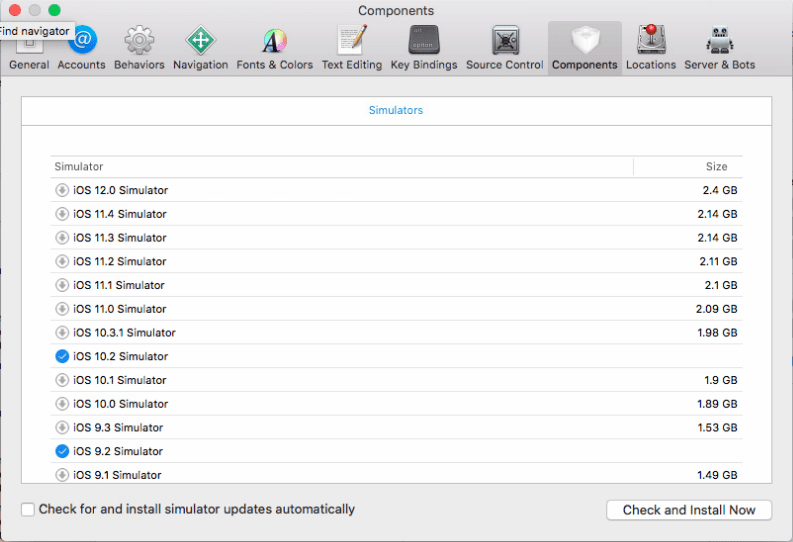
To do the same you can launch XCode and the go to XCode>Preferences>Components.
There you will see various iOS versions, you can choose whichever version you feel like downloading. I will be using iOS 12.1 for this demonstration.
One you are done with setting up your device, we can now move forward with the next phase that is actual installation. The apps that I will be installing are:
- iGoat
- DVIA-v2
Installing iGoat
Installation of iGoat is pretty straight forward and easy. To install it first head over to it’s official github repository (https://github.com/OWASP/igoat). Once there, clone the entire repo using Git if you have it installed else download the zip and then extract it anywhere on your system.
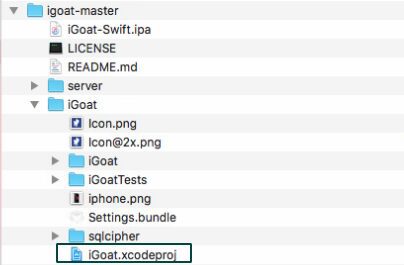
Now, locate the folder where you have the cloned/extracted iGoat master branch. Inside the folder search for “iGoat.xcodeproj”.
Ideally, you will find it under the path “../cloned_folder/iGoat/iGoat.xcodeproj”. Now open this using XCode.
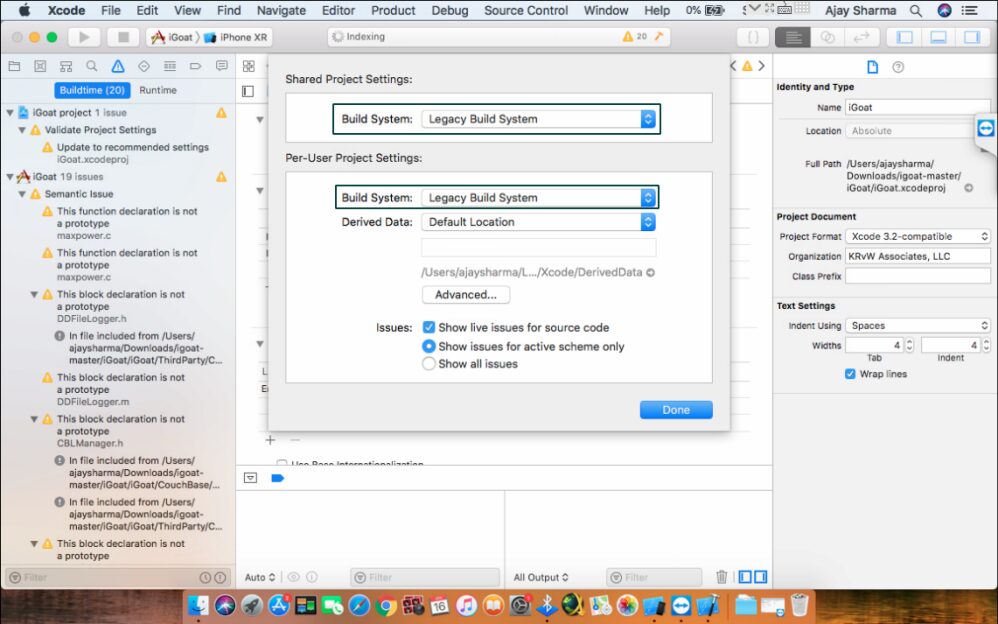
Once, the project open it will take some time to index the files of the project. Now, head over to File that can be found on the menu bar of XCode and navigate to File>Project Settings. There you will see a build setting (under two headings one being Shared project settings and the other one Per-User settings), change both of them to the Legacy build system as shown in the picture.
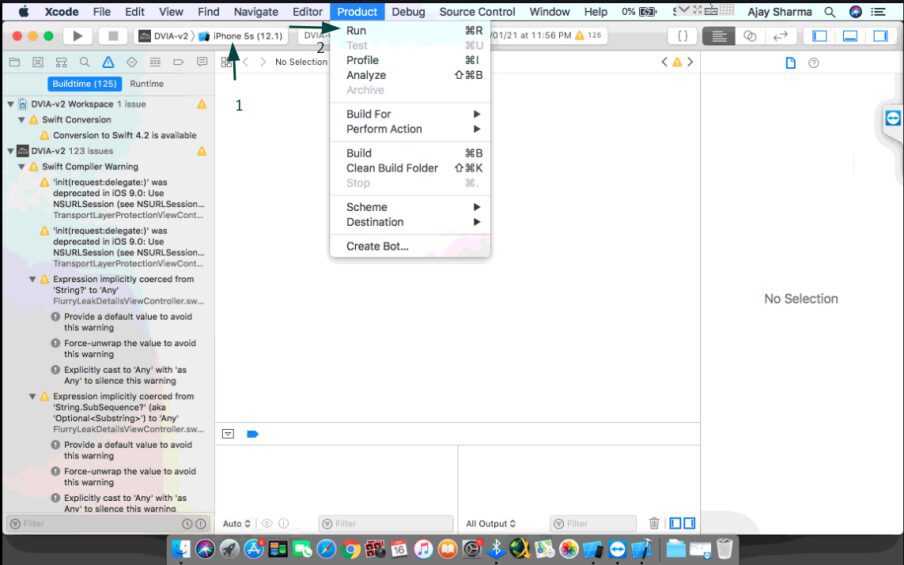
After the files have finished indexing look at the upper left corner, there you can see the model of the iPhone you wish to simulate. If you see a different version than what you wished you can click on it and change it to the desired model. Finally, click on project and then run, this will first build the project and then run the project on the target device. Congrats, now you have a fully functioning iGoat app on your iOS simulator, you can now safely close XCode if you wish to do so.
Installing DVIA
Installation of DVIA follows more or less the same procedure but with a subtle difference that rather than using the “.xcodeproj” we will use the “.xcworkspace” file. Also, we will need something called as CocoaPods. CocoaPods is an application-level dependency manager for Objective-C, Swift, and any other languages that run on the Objective-C runtime, such as RubyMotion, that provides a standard format for managing external libraries.
To install CocoaPods on a mac machine, open a terminal and paste in the command
“sudo gem install cocoapods”.
After this head over to DVIA’s Github repo (https://github.com/prateek147/DVIA-v2) to download the source code.
Once you have cocoapods installed, open a new terminal and navigate to “../cloned_folder/DVIA-v2”.
Here you will see there is a file called “Podfile”. Now on that same terminal run command “pod install” and wait for the installation to complete.
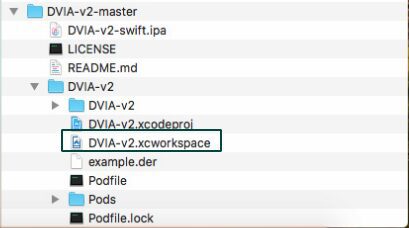
After the installation completes you can safely close the terminal and then, open the same folder in finder and then open the file “../cloned_folder/DVIA-v2DVIA-v2.xcworkspace” using XCode.
It will take some time to index the file, once the indexing completes following the same procedure as mentioned above to change the target device and build settings. Since we have opened a workspace rather than a project you will find under File “Workspace Settings” and not “Project Settings”.
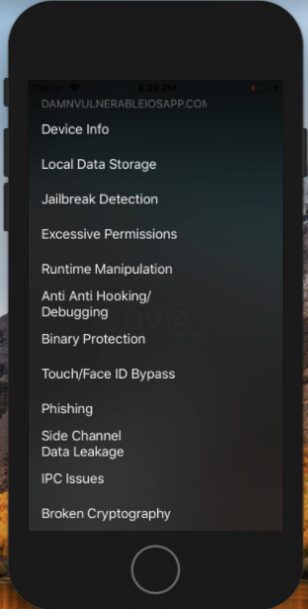
Now follow the same procedure to build the project as you did for iGoat and you will see that your app will start building and then it will be launched on the simulator. You can use the picture below for any reference in case you need one.



Recent Comments